Introduction 00:00
In this lesson, we are going to learn how to create a mini-game.

We play a marble and we have to go through a level filled with various moving obstacles in order to reach the destination.
Here are some of the mechanics:
- The player can move the marble and make it jump with the keyboard.
- As soon as the marble is moving, a timer starts running and it indicates to the player how long it took to finish the obstacle course.
- At the end of the race, a “restart” button appears and by clicking on it, it will reset the marble to the initial position, reset the timer and create a new set of obstacles so that the level is never the same.
This lesson is a good opportunity to put into practice the knowledge we gathered like physics, interface & components but also new concepts like a global state or keyboard controls.
And obviously, we get to create and play a game!
Setup 00:49
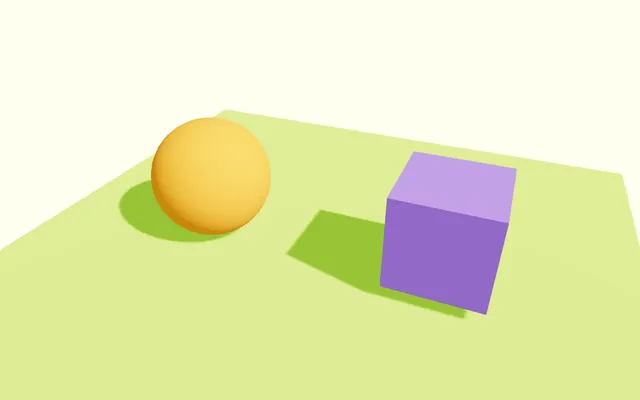
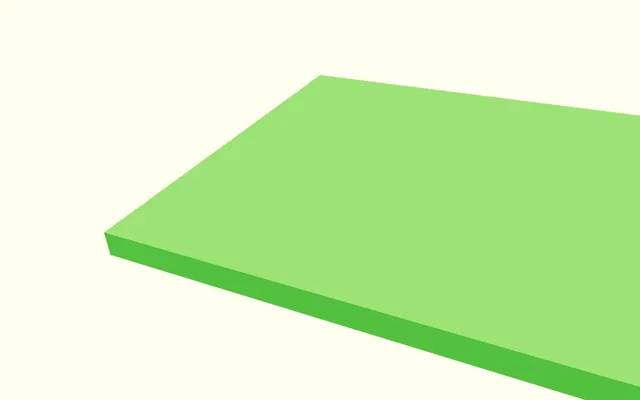
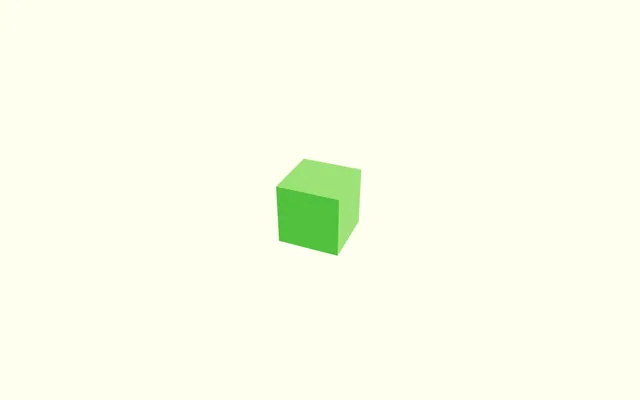
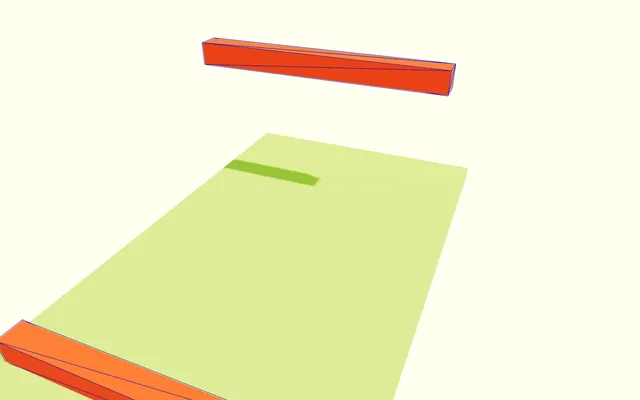
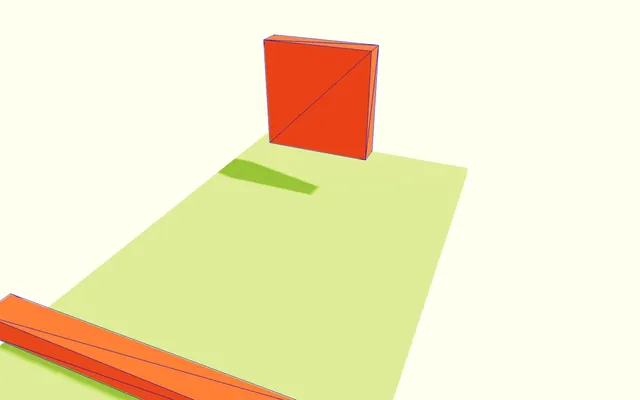
In the starter, we have the classic orange sphere, purple cube, and green floor.
Both the directional light source and an ambient light source are in a <Lights> component because we are going to make some tweaks related to lights a bit later and we want to keep things organised.
Shadows are already enabled and the directional light is set to cast the shadows within a pretty large area:
<directionalLight
    castShadow
    position={ [ 4, 4, 1 ] }
    intensity={ 1.5 }
    shadow-mapSize={ [ 1024, 1024 ] }
    shadow-camera-near={ 1 }
    shadow-camera-far={ 10 }
    shadow-camera-top={ 10 }
    shadow-camera-right={ 10 }
    shadow-camera-bottom={ - 10 }
    shadow-camera-left={ - 10 }
/>
The @react-three/drei dependency is already installed within the project.
We are using the OrbitControls helper to be able to move the camera around, but we are going to remove it later so that we can have the camera follow the marble.
We haven’t added <Perf /> from r3f-perf but you should definitely use it if you create your own game. Having a good frame rate is very important and monitoring performance will help you.
No debug UI has been added because all the various values and colors have already been carefully chosen, but you should definitely add one (like Leva) if you were to create your own game or if you want to improve this game once you are done with the lesson.
Level 01:53
When creating a game, it’s good to have things on screen as quickly as possible. Even if the mechanics don’t work yet, it helps to get an idea of what’s coming up and it’s much more interesting.
That’s why we are going to start by creating the level and its various traps.
Our level will be composed of what we are going to call blocks.
The first block will be composed of a simple floor without anything else. It’s where the player will start.
The last block will be the finish line.
In between, there will be a bunch of trap blocks with moving obstacles.
We are going to create 3 different types of traps and then populate the blocks between the start and the end with a random set composed of those trap blocks.
Component
In /src/, create a Level.jsx file, export a Level function component and put the 3 meshes from Experience in it:
export default function Level()
{
    return <>
        <mesh castShadow position-x={ - 2 }>
            <sphereGeometry />
            <meshStandardMaterial color="orange" />
        </mesh>

        <mesh castShadow position-x={ 2 } scale={ 1.5 }>
            <boxGeometry />
            <meshStandardMaterial color="mediumpurple" />
        </mesh>

        <mesh receiveShadow position-y={ - 1 } rotation-x={ - Math.PI * 0.5 } scale={ 10 }>
            <planeGeometry />
            <meshStandardMaterial color="greenyellow" />
        </mesh>
    </>
}
In Experience, import Level:
import Level from './Level.jsx'Instantiate it after the <Lights>:
export default function Experience()
{
    return <>

        <OrbitControls makeDefault />

        <Lights />
        <Level />

    </>
}
We have our little scene back, but now it’s set in the <Level>.
Add Physics
The game will rely heavily on physics and we are going to use Rapier with @react-three/rapier as seen in the previous lesson.
In the terminal, run npm install @react-three/rapier@1.4 (we force the version to prevent surprises; you can ignore potential vulnerability warnings).
We are going to add the physics at a high level so that all components can use it.
In Experience, import Physics from @react-three/rapier:
import { Physics } from '@react-three/rapier'Wrap the <Lights /> and <Level /> in <Physics> and add the debug attribute:
export default function Experience()
{
    return <>

        <OrbitControls makeDefault />

        <Physics debug>
            <Lights />
            <Level />
        </Physics>

    </>
}
Nothing has changed, but now we can use physics-related components like <RigidBody> in the <Level>.
Start block
As mentioned earlier, the first block will be where the player starts and we only want a floor.
Component
In order to keep things well organised and reusable, we are going to put each type of block in a separate component.
Those components don’t need to be in separate files which is why we are going to put them all in Level.jsx.
Create a BlockStart component right before the Level component:
function BlockStart()
{
    return null
}

export default function Level()
{
    // ...
}
Even if it returns nothing (null), we can use it in the Level:
export default function Level()
{
    return <>
        {/* ... */}

        <BlockStart />
    </>
}
In this component, we are going to create a floor with a 4 by 0.2 by 4 <boxGeometry> and a <meshStandardMaterial> with the color set to "limegreen":
function BlockStart()
{
    return <mesh>
        <boxGeometry args={ [ 4, 0.2, 4 ] } />
        <meshStandardMaterial color="limegreen" />
    </mesh>
}

Move it down slightly with the position attribute so that the top surface is at 0:
<mesh position={ [ 0, - 0.1, 0 ] }>
    <boxGeometry args={ [ 4, 0.2, 4 ] } />
    <meshStandardMaterial color="limegreen" />
</mesh>
Then, add receiveShadow to it (we don’t need castShadow because there is nothing below the floor that could be affected by the shadow):
<mesh position={ [ 0, - 0.1, 0 ] } receiveShadow>
    <boxGeometry args={ [ 4, 0.2, 4 ] } />
    <meshStandardMaterial color="limegreen" />
</mesh>
Remove old scenery
Now that we have something related to the game to see, remove the previous scene (the 3 <mesh> in Level):
export default function Level()
{
    return <>
        <BlockStart />
    </>
}
Positioning
The Start block is already at the right position which is the origin of the scene, but other blocks will need to be positioned differently. For that reason, we are going to add a position prop to every block.
Add a position prop to BlockStart and set its default value to [ 0, 0, 0 ]:
function BlockStart({ position = [ 0, 0, 0 ] })
{
    {/* ... */}
}
Apply that position to a <group> wrapping the <mesh>:
function BlockStart({ position = [ 0, 0, 0 ] })
{
    return <group position={ position }>
        <mesh position={ [ 0, - 0.1, 0 ] } receiveShadow>
            <boxGeometry args={ [ 4, 0.2, 4 ] } />
            <meshStandardMaterial color="limegreen" />
        </mesh>
    </group>
}
The <group> has no real usage in this case since we have only one child inside, but it’ll become useful for the other blocks and if you want to add more things inside the Start block.
We can now control the <BlockStart /> positioning with a position attribute:
<BlockStart position={ [ 2, 2, 2 ] } />
But as we said earlier, the <BlockStart /> is fine at 0, 0, 0:
<BlockStart position={ [ 0, 0, 0 ] } />
And that’s it for our first block!
You might think that we are missing important parts like adding physics to that floor or the side walls, but we are going to add those at the end so that we have long walls going all the way to the end of the level with as few <RigidBody> as possible.
Optimisation
Before going any further, we need to optimise our code in preparation for what’s coming.
At the end, we will have a bunch of blocks and while they are different in some ways, you’ll see that most of their geometries and materials will be the same. Instead of creating new geometries and new materials inside each block, we are going to create them outside just once.
Geometries
Let’s start with the geometries.
The whole level will be composed of <boxGeometry> and if we have dozens of blocks, we will end up with a lot of BoxGeometry instances which will result in performance issues.
To fix that, we are going to instantiate only one BoxGeometry outside of the components using native Three.js and use it everywhere we need it.
In Level.jsx, Import Three.js:
import * as THREE from 'three'Instantiate one BoxGeometry and assign it to a boxGeometry variable outside of the two components we have:
const boxGeometry = new THREE.BoxGeometry(1, 1, 1)

function BlockStart({ position = [ 0, 0, 0 ] })
{
    // ...
}

export default function Level()
{
    // ...
}
In BlockStart, remove the <boxGeometry> and use the boxGeometry variable on the geometry attribute of the <mesh> instead:
<mesh geometry={ boxGeometry } position={ [ 0, - 0.1, 0 ] } receiveShadow>
    <meshStandardMaterial color="limegreen" />
</mesh>
Ok cool, but that’s not the right shape.
Here’s the trick. We are going to change the scale attribute on the <mesh>:
<mesh geometry={ boxGeometry } position={ [ 0, - 0.1, 0 ] } scale={ [ 4, 0.2, 4 ] } receiveShadow>
    <meshStandardMaterial color="limegreen" />
</mesh>
And we have our floor back.
Materials
Let’s do the same for the materials.
Currently, we have only one material using the colour "limegreen", but to move our game along, we are going to create all the materials we need immediately:
floor1Materialfor the Start and End blocks floors ("limegreen")floor2Materialfor the trap blocks floors ("greenyellow")obstacleMaterialfor the obstacles ("orangered")wallMaterialfor the walls ("slategrey")
And yes, I spent at least half an hour testing colors…
Create all the materials outside of the components like we did with the boxGeometry and use MeshStandardMaterial:
const boxGeometry = new THREE.BoxGeometry(1, 1, 1)

const floor1Material = new THREE.MeshStandardMaterial({ color: 'limegreen' })
const floor2Material = new THREE.MeshStandardMaterial({ color: 'greenyellow' })
const obstacleMaterial = new THREE.MeshStandardMaterial({ color: 'orangered' })
const wallMaterial = new THREE.MeshStandardMaterial({ color: 'slategrey' })

function BlockStart({ position = [ 0, 0, 0 ] })
{
    // ...
}

export default function Level()
{
    // ...
}
Use floor1Material on the <mesh> with the material attribute instead of <meshStandardMaterial /> (you can use auto-closing since there is nothing inside <mesh> anymore):
<mesh geometry={ boxGeometry } material={ floor1Material } position={ [ 0, - 0.1, 0 ] } scale={ [ 4, 0.2, 4 ] } receiveShadow />
The <mesh> code is getting quite long for a single line. Since we are going to have a lot of code in this file, we are not going to add a lot of line breaks, but feel free to organise your code however you like it.
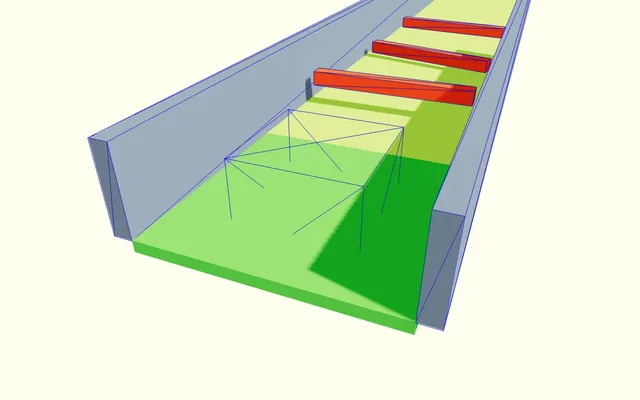
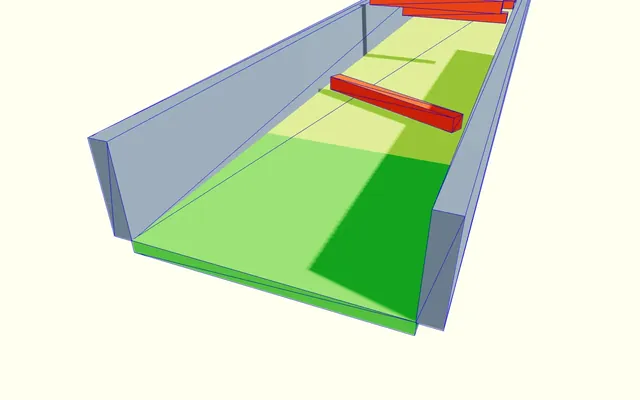
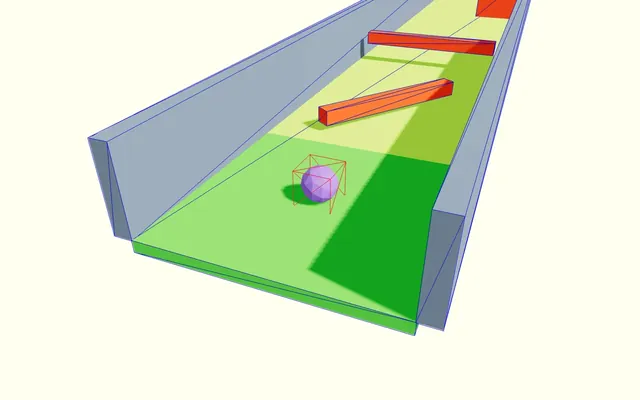
Spinner trap block
Let’s create our first trap block which is going to be a spinner like we did in the previous lesson (although we called it “twister”).
If you want to practice, now would be a good opportunity to try it yourself.
Let’s do it together.
Component
Duplicate the BlockStart function component and call it BlockSpinner:
function BlockStart({ position = [ 0, 0, 0 ] })
{
    // ...
}

function BlockSpinner({ position = [ 0, 0, 0 ] })
{
    return <group position={ position }>
        <mesh geometry={ boxGeometry } material={ floor1Material } position={ [ 0, - 0.1, 0 ] } scale={ [ 4, 0.2, 4 ] } receiveShadow />
    </group>
}
Instantiate it in Level and change both <BlockStart /> and <BlockSpinner /> positions so that the Spinner block is in the center for debugging purposes (later, the blocks will be positioned automatically):
export default function Level()
{
    return <>
        <BlockStart position={ [ 0, 0, 4 ] } />
        <BlockSpinner position={ [ 0, 0, 0 ] } />
    </>
}

In BlockSpinner, set the floor <mesh> material to floor2Material to distinguish the trap blocks from the Start block:
function BlockSpinner({ position = [ 0, 0, 0 ] })
{
    return <group position={ position }>
        <mesh geometry={ boxGeometry } material={ floor2Material } position={ [ 0, - 0.1, 0 ] } scale={ [ 4, 0.2, 4 ] } receiveShadow />
    </group>
}

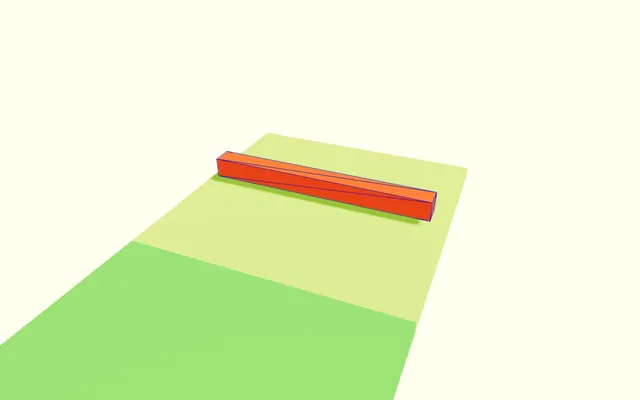
Obstacle
For the obstacle, we want a bar rotating on its y axis smack in the middle of the block.
First, create the <mesh> using the boxGeometry and the obstacleMaterial material:
function BlockSpinner({ position = [ 0, 0, 0 ] })
{
    return <group position={ position }>
        {/* ... */}

        <mesh geometry={ boxGeometry } material={ obstacleMaterial } scale={ [ 3.5, 0.3, 0.3 ] } />
    </group>
}
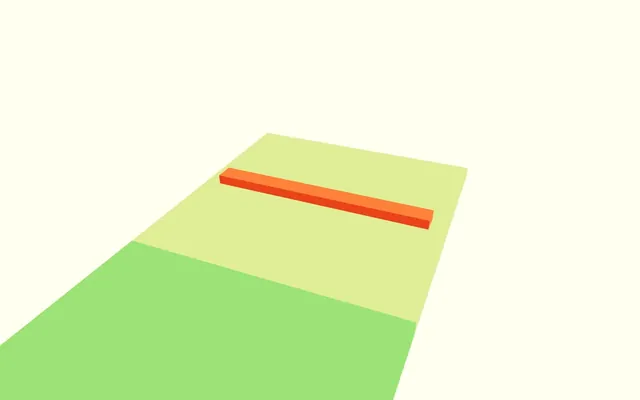
The obstacle seems to penetrate the floor, but we are going to fix that later.
Don’t forget to set its castShadow and receiveShadow attributes:
<mesh geometry={ boxGeometry } material={ obstacleMaterial } scale={ [ 3.5, 0.3, 0.3 ] } castShadow receiveShadow />

Obstacle physics
We can finally add some physics.
In Level.jsx, Import RigidBody from @react-three/rapier:
import { RigidBody } from '@react-three/rapier'Wrap the obstacle <mesh> in a <RigidBody>:
<RigidBody>
    <mesh geometry={ boxGeometry } material={ obstacleMaterial } scale={ [ 3.5, 0.3, 0.3 ] } castShadow receiveShadow />
</RigidBody>
The RigidBody is falling because there is no floor. But we don’t want the obstacle to behave like any other physical object. We want it to follow a very specific movement (a rotation in our case) without falling or being pushed away.
Like we did in the previous lesson, we need to set the type attribute to "kinematicPosition":
<RigidBody type="kinematicPosition">
    {/* ... */}
</RigidBody>
The obstacle is not falling anymore.
Let’s lift it up slightly above the ground directly on the <RigidBody> with the position attribute:
<RigidBody type="kinematicPosition" position={ [ 0, 0.3, 0 ] }>
    {/* ... */}
</RigidBody>
Before animating it, we can set its restitution to 0.2 and friction to 0 so that the marble will bounce a little, without rubbing too much against the floor. That's because we don't want the marble to stop rolling:
<RigidBody type="kinematicPosition" position={ [ 0, 0.3, 0 ] } restitution={ 0.2 } friction={ 0 }>
    {/* ... */}
</RigidBody>
It’s time to animate it. First, we need a reference.
Import useRef from react:
import { useRef } from 'react'Create an obstacle reference:
function BlockSpinner({ position = [ 0, 0, 0 ] })
{
    const obstacle = useRef()

    // ..
}
And assign it to the <RigidBody> with the ref attribute:
<RigidBody ref={ obstacle } type="kinematicPosition" position={ [ 0, 0.3, 0 ] } restitution={ 0.2 } friction={ 0 }>
    {/* ... */}
</RigidBody>
Since we want the obstacle to rotate at all times, we are going to do it for each frame.
Import useFrame from @react-three/fiber:
import { useFrame } from '@react-three/fiber'Call it in BlockSpinner, send it a function with a state argument, and retrieve the elapsed time using the state.clock.getElapsedTime():
function BlockSpinner({ position = [ 0, 0, 0 ] })
{
    const obstacle = useRef()

    useFrame((state) =>
    {
        const time = state.clock.getElapsedTime()
        console.log(time)
    })

    // ...
}
To rotate the spinner, we have to use the setNextKinematicRotation, but this method is expecting a Quaternion.
To make things a bit less cumbersome, we are going to use the already imported Three.js to create that Quaternion from a Euler like we did in the Physics lesson:
useFrame((state) =>
{
    const time = state.clock.getElapsedTime()

    const rotation = new THREE.Quaternion()
    rotation.setFromEuler(new THREE.Euler(0, time, 0))
    obstacle.current.setNextKinematicRotation(rotation)
})
The rotation speed is good, but if we add a bunch of BlockSpinner, they’ll all have the same rotation which is going to be a bit odd and boring for the player.
To fix that, we are going to create a random speed and multiply the time by it.
But we need to create that random speed only once for each <BlockSpinner>. To do that, we are going to use a state.
Import useState from react:
import { useState, useRef } from 'react'Use it in BlockSpinner to get a random value between 0 and 1 with Math.random():
function BlockSpinner({ position = [ 0, 0, 0 ] })
{
    const obstacle = useRef()
    const [ speed ] = useState(() => Math.random())

    // ...
}
And then, multiply the time by speed in the Euler:
rotation.setFromEuler(new THREE.Euler(0, time * speed, 0))To prevent the rotation from being too slow, we can add 0.2 to it:
const [ speed ] = useState(() => Math.random() + 0.2)The rotation is pretty good, but it always spins in the same direction.
To fix that, we are going to perform a small trick. We are going to implement a new Math.random() and test if the result is below 0.5. If so, we are going to multiply the speed by - 1, otherwise, by 1. And we are going to do that in the useState directly with a ternary condition:
const [ speed ] = useState(() => (Math.random() + 0.2) * (Math.random() < 0.5 ? - 1 : 1))The spinner now rotates in both directions and, now, we can start working on the next trap.
Limbo trap block
And that next trap is going to consist of a bar going up and down, which we are going to call limbo (like that challenge where you have to pass below a bar without falling).
This one is going to be easier since it’s very similar to the BlockSpinner.
Component
Duplicate the BlockSpinner function component and call it BlockLimbo:
function BlockSpinner({ position = [ 0, 0, 0 ] })
{
    // ...
}

function BlockLimbo({ position = [ 0, 0, 0 ] })
{
    const obstacle = useRef()
    const [ speed ] = useState(() => (Math.random() + 0.2) * (Math.random() < 0.5 ? - 1 : 1))

    useFrame((state) =>
    {
        const time = state.clock.getElapsedTime()

        const rotation = new THREE.Quaternion()
        rotation.setFromEuler(new THREE.Euler(0, time * speed, 0))
        obstacle.current.setNextKinematicRotation(rotation)
    })

    return <group position={ position }>
        <mesh geometry={ boxGeometry } material={ floor2Material } position={ [ 0, - 0.1, 0 ] } scale={ [ 4, 0.2, 4 ] }  receiveShadow />
        <RigidBody ref={ obstacle } type="kinematicPosition" position={ [ 0, 0.3, 0 ] } restitution={ 0.2 } friction={ 0 }>
            <mesh geometry={ boxGeometry } material={ obstacleMaterial } scale={ [ 3.5, 0.3, 0.3 ] } castShadow receiveShadow />
        </RigidBody>
    </group>
}
Instantiate <BlockLimbo> in <Level> and change all three blocks’ positions so that the Limbo block is in the center:
export default function Level()
{
    return <>
        <BlockStart position={ [ 0, 0, 8 ] } />
        <BlockSpinner position={ [ 0, 0, 4 ] } />
        <BlockLimbo position={ [ 0, 0, 0 ] } />
    </>
}
Animation
This time, we want the obstacle to move up and down rather than rotate.
To do that, instead of setNextKinematicRotation we need to use setNextKinematicTranslation and send it a Vector3. And since we want the obstacle to go up and down forever, we can use Math.sin() and send it the time.
If you want to practice, now would be a good opportunity to try it yourself.
useFrame((state) =>
{
    const time = state.clock.getElapsedTime()

    const y = Math.sin(time)
    obstacle.current.setNextKinematicTranslation({ x: 0, y: y, z: 0 })
})
Right now, the obstacle sinks through the floor. However, we can fix that by adding a fixed number to y:
useFrame((state) =>
{
    const time = state.clock.getElapsedTime()

    const y = Math.sin(time) + 1.15
    obstacle.current.setNextKinematicTranslation({ x: 0, y: y, z: 0 })
})
Similar to the BlockSpinner, implementing a bunch of <BlockLimbo> will result in identical animations. This time, instead of messing with the speed, we are simply going to offset the animation in time.
And since we are not using the speed state anymore, we can replace it by timeOffset and set it a random value between 0 and Math.PI * 2 (because it’s going through a sin()):
function BlockLimbo({ position = [ 0, 0, 0 ] })
{
    const obstacle = useRef()
    const [ timeOffset ] = useState(() => Math.random() * Math.PI * 2)

    // ...
}
We can then add timeOffset to time in the Math.sin():
const y = Math.sin(time + timeOffset) + 1.15This will only be noticeable once we have multiple Limbo blocks.
Fix the kinematic position
We made a small mistake and we can notice it if we move the component before adding the next block:
export default function Level()
{
    return <>
        <BlockStart position={ [ 0, 0, 12 ] } />
        <BlockSpinner position={ [ 0, 0, 8 ] } />
        <BlockLimbo position={ [ 0, 0, 4 ] } />
    </>
}
As you can see, there is an issue with the obstacle as it stays at its initial position, even if the surrounding <group> is moved.
It’s not a bug. Using setNextKinematicTranslation will position it at absolute coordinates and since we set the z to 0, it’ll stay there.
To fix that, we can use the position prop in setNextKinematicTranslation:
obstacle.current.setNextKinematicTranslation({ x: position[0], y: position[1] + y, z: position[2] })We’ve used it on all 3 axes, in case you want to move the blocks in the x or the y axes.
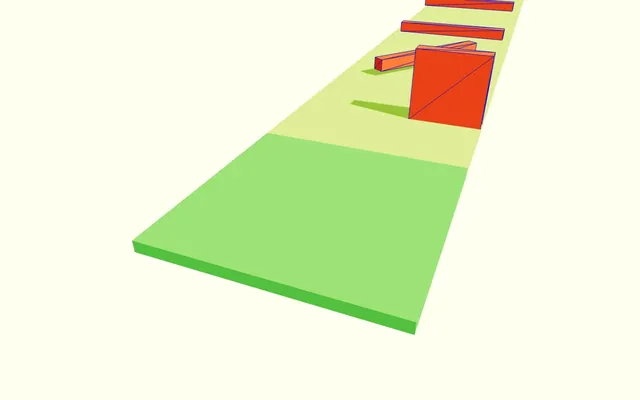
Axe trap block
The next trap is going to be very similar to the Limbo block, but with the obstacle moving horizontally as if it were a balancing axe, which is often featured in dungeon games.
Component
Duplicate the BlockLimbo function component and call it BlockAxe:
function BlockLimbo({ position = [ 0, 0, 0 ] })
{
    // ...
}

function BlockAxe({ position = [ 0, 0, 0 ] })
{
    const obstacle = useRef()
    const [ timeOffset ] = useState(() => Math.random() * Math.PI * 2)

    useFrame((state) =>
    {
        const time = state.clock.getElapsedTime()

        const y = Math.sin(time + timeOffset) + 1.15
        obstacle.current.setNextKinematicTranslation({ x: position[0], y: position[1] + y, z: position[2] })
    })

    return <group position={ position }>
        <mesh geometry={ boxGeometry } material={ floor2Material } position={ [ 0, - 0.1, 0 ] } scale={ [ 4, 0.2, 4 ] }  receiveShadow />
        <RigidBody ref={ obstacle } type="kinematicPosition" position={ [ 0, 0.3, 0 ] } restitution={ 0.2 } friction={ 0 }>
            <mesh geometry={ boxGeometry } material={ obstacleMaterial } scale={ [ 3.5, 0.3, 0.3 ] } castShadow receiveShadow />
        </RigidBody>
    </group>
}
Then, instantiate <BlockAxe> in <Level> and change all three blocks’ positions so that the Axe block is in the center (although it should already be the case):
export default function Level()
{
    return <>
        <BlockStart position={ [ 0, 0, 12 ] } />
        <BlockSpinner position={ [ 0, 0, 8 ] } />
        <BlockLimbo position={ [ 0, 0, 4 ] } />
        <BlockAxe position={ [ 0, 0, 0 ] } />
    </>
}
Shape
Replace the scale on the obstacle <mesh> in order to make it more imposing:
<mesh geometry={ boxGeometry } material={ obstacleMaterial } scale={ [ 1.5, 1.5, 0.3 ] } castShadow receiveShadow />
Animation
Move the obstacle on the x axis instead of y and remove the + 1.25:
useFrame((state) =>
{
    const time = state.clock.getElapsedTime()

    const x = Math.sin(time + timeOffset)
    obstacle.current.setNextKinematicTranslation({ x: position[0] + x, y: position[1], z: position[2] })
})
Move it up a little on the y:
obstacle.current.setNextKinematicTranslation({ x: position[0] + x, y: position[1] + 0.75, z: position[2] })Increase the amplitude of the Math.sin() by multiplying it by 1.25 so that the obstacle moves from side to side:
const x = Math.sin(time + timeOffset) * 1.25Cool. Now we are done with the final trap block.
We could have added more variations, but we still have a lot of ground to cover in this lesson.
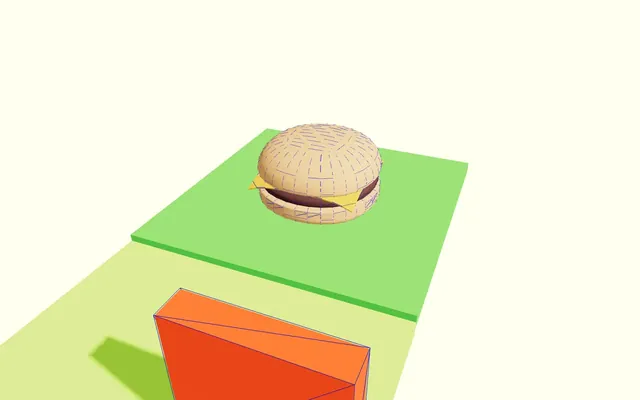
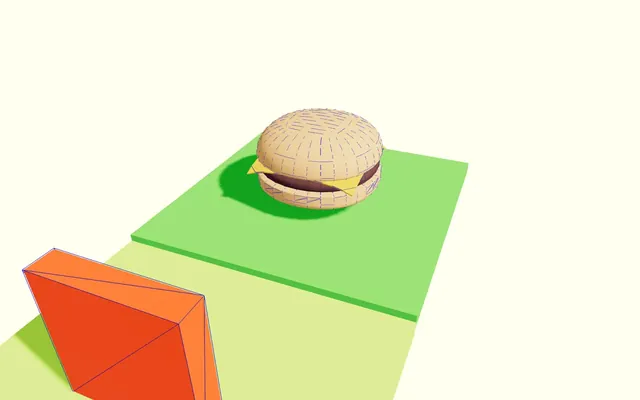
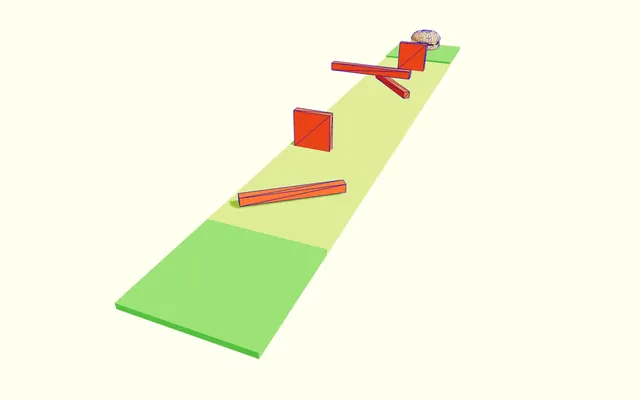
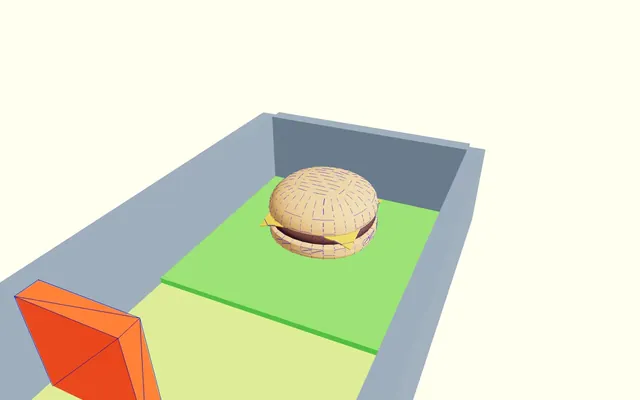
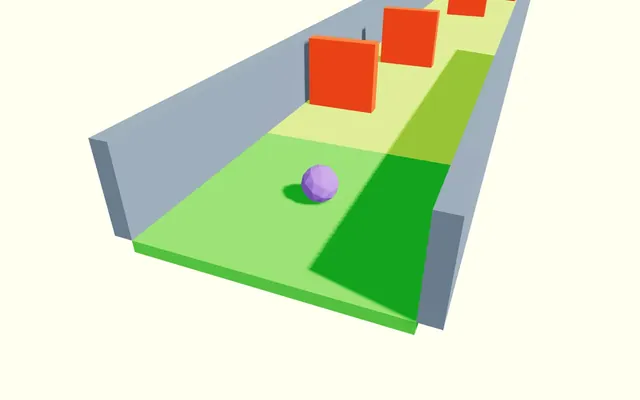
End block
To finish, let’s create the end block.
Component
Duplicate the BlockStart function component and call it BlockEnd:
function BlockStart({ position = [ 0, 0, 0 ] })
{
    // ...
}

function BlockEnd({ position = [ 0, 0, 0 ] })
{
    return <group position={ position }>
        <mesh geometry={ boxGeometry } material={ floor1Material } position={ [ 0, - 0.1, 0 ] } scale={ [ 4, 0.2, 4 ] } />
    </group>
}
Instantiate it in <Level> and change all three blocks’ positions so that the end block is in the center:
export default function Level()
{
    return <>
        <BlockStart position={ [ 0, 0, 16 ] } />
        <BlockSpinner position={ [ 0, 0, 12 ] } />
        <BlockLimbo position={ [ 0, 0, 8 ] } />
        <BlockAxe position={ [ 0, 0, 4 ] } />
        <BlockEnd position={ [ 0, 0, 0 ] } />
    </>
}
Back to the BlockEnd, move the floor <mesh> up by setting its position attribute to 0, 0, 0:
<mesh geometry={ boxGeometry } material={ floor1Material } position={ [ 0, 0, 0 ] } scale={ [ 4, 0.2, 4 ] } receiveShadow />
This creates a better separation between the traps and the finish line. In addition, it also looks similar to low poly grass.
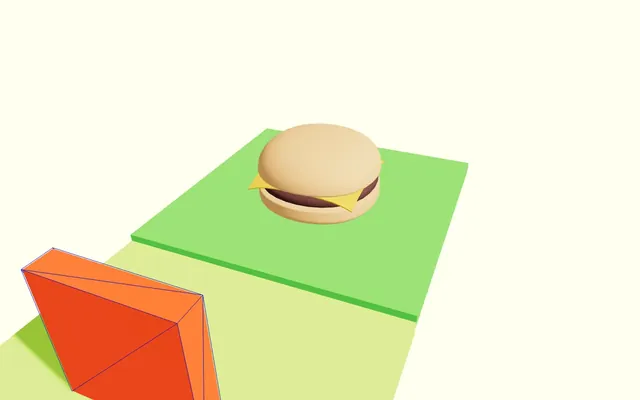
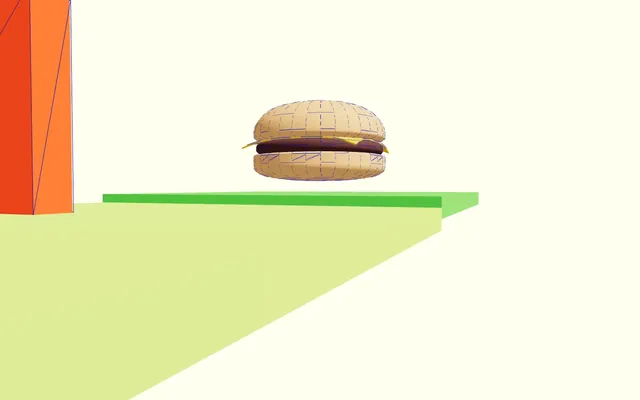
Hamburger
We are going to make the finish line a bit more attractive by adding a hamburger. It’ll serve as some sort of reward for finishing the level.
The hamburger model is already located in the public folder as hamburger.glb.
First, import useGLTF from @react-three/drei:
import { useGLTF } from '@react-three/drei'Then, load the hamburger with useGLTF:
function BlockEnd({ position = [ 0, 0, 0 ] })
{
    const hamburger = useGLTF('./hamburger.glb')

    // ...
}
Now, add it to the <group> with a <primitive>:
function BlockEnd({ position = [ 0, 0, 0 ] })
{
    const hamburger = useGLTF('./hamburger.glb')

    return <group position={ position }>
        {/* ... */}
        <primitive object={ hamburger.scene } />
    </group>
}
Finally, scale it down to 0.2:
<primitive object={ hamburger.scene } scale={ 0.2 } />
Because we don’t want the marble to go through our hamburger, we need to add physics to it.
Wrap the <primitive> in a <RigidBody>, and set its type to 'fixed':
<RigidBody type="fixed">
    <primitive object={ hamburger.scene } scale={ 0.2 } />
</RigidBody>

The colliders don’t match the model very well.
Set its colliders attribute to "hull" in order to fix that issue:
<RigidBody type="fixed" colliders="hull">
    <primitive object={ hamburger.scene } scale={ 0.2 } />
</RigidBody>
Then, set the restitution to 0.2 and friction to 0 so that the marble will bounce a little, without rubbing too much against the floor:
<RigidBody type="fixed" colliders="hull" restitution={ 0.2 } friction={ 0 }>
    <primitive object={ hamburger.scene } scale={ 0.2 } />
</RigidBody>
Move it up a little with the position attribute on the <RigidBody>:
<RigidBody type="fixed" colliders="hull" position={ [ 0, 0.25, 0 ] } restitution={ 0.2 } friction={ 0 }>
    <primitive object={ hamburger.scene } scale={ 0.2 } />
</RigidBody>
Finally, let’s activate shadows on that hamburger.
Since the hamburger scene only contains meshes, we can use a forEach on hamburger.scene.children and set the castShadow to true in it:
function BlockEnd({ position = [ 0, 0, 0 ] })
{
    const hamburger = useGLTF('./hamburger.glb')
    hamburger.scene.children.forEach((mesh) =>
    {
        mesh.castShadow = true
    })

    // ...
}
We don’t need the hamburger to receive shadow since there is nothing on top of it and native Three.js shadow tends to produce shadow acne on rounded shapes like the buns.
Right, now we are done creating the blocks.
You can obviously create many additional traps and improve the Start and End blocks, but unfortunately, now we have to move on.
Shuffle the blocks
Until now, we have been positioning the blocks manually.
We would like those blocks to position themselves automatically. On top of that, we’d like to be able to decide how many traps we want between the Start block and the End block. Additionally, we want the traps to be randomly chosen so that levels are never the same.
Start Block
First, let’s remove all blocks but the <BlockStart> and set its position to 0, 0, 0:
export default function Level()
{
    return <>
        <BlockStart position={ [ 0, 0, 0 ] } />
    </>
}
Trap blocks
For the trap blocks, we are going to create an array of blocks randomly chosen from the three types of blocks we currently have.
First, create a count variable, which is set to 5:
export default function Level()
{
    const count = 5

    // ...
}
Now, create an array containing all available types of trap blocks:
export default function Level()
{
    const count = 5
    const types = [ BlockSpinner, BlockAxe, BlockLimbo ]

    // ...
}
What we did here works, but if we were to provide our component to other developers, they would also have to dive into the Level.jsx code to change those variables.
To make things a bit better and more flexible, we are going to use props.
Move the count and the types variable to the Level props and set the same default values:
export default function Level({ count = 5, types = [ BlockSpinner, BlockAxe, BlockLimbo ] })
{
    return <>
        <BlockStart position={ [ 0, 0, 0 ] } />
    </>
}
While this is totally optional, it doesn’t cost much and it makes our component more convenient, especially for other potential developers.
For example (but don’t do it), we could easily add 10 spinners, by coding the following:
<Level count={ 10 } types={ [ BlockSpinner ] } />But this means that we also need to allow developers to import the various blocks we’ve created.
In order to do that, add an export in front of every block:
export function BlockStart({ position = [ 0, 0, 0 ] })
{
    // ...
}

export function BlockEnd({ position = [ 0, 0, 0 ] })
{
    // ...
}

export function BlockSpinner({ position = [ 0, 0, 0 ] })
{
    // ...
}

export function BlockLimbo({ position = [ 0, 0, 0 ] })
{
    // ...
}

export function BlockAxe({ position = [ 0, 0, 0 ] })
{
    // ...
}

// ...
And since our Level isn’t the only component being exported from the Level.jsx file, we can remove the default in front of the Level function:
export function Level({ count = 5, types = [ BlockSpinner, BlockAxe, BlockLimbo ] })
{
    // ...
}
Good. Now update the way we import Level accordingly in Experience.jsx:
import { Level } from './Level.jsx'Back to our Level.jsx.
We now want to generate a count long array of random traps chosen from the types array and keep that array and what’s inside even if the Level component is being re-rendered.
To do that, we are going to use useMemo.
First, import useMemo from react:
import { useMemo, useState, useRef } from 'react'In Level, call useMemo to return a blocks array and set the dependencies to count and types:
export function Level({ count = 5, types = [ BlockSpinner, BlockAxe, BlockLimbo ] })
{
    const blocks = useMemo(() =>
    {
        const blocks = []

        return blocks
    }, [ count, types ])

    // ...
}
useMemo will return a different value only if count or types change.
Let’s log blocks after useMemo:
export function Level({ count = 5, types = [ BlockSpinner, BlockAxe, BlockLimbo ] })
{
    const blocks = useMemo(() =>
    {
        const blocks = []

        return blocks
    }, [ count, types ])

    console.log(blocks)

    // ...
}
To keep things simple, we are going to code a traditional for loop to fill the blocks array and, for now, take the first value from types:
const blocks = useMemo(() =>
{
    const blocks = []

    for(let i = 0; i < count; i++)
    {
        const type = types[0]
        blocks.push(type)
    }

    return blocks
}, [ count, types ])
Currently, we get 5 Spinner blocks.
In order to pick random items from the array, we can use Math.random() multiplied by types.length and floor it with Math.floor() so that we get indexes:
const type = types[ Math.floor(Math.random() * types.length) ]We now have a random set of traps, which means we can now remove the console.log.
Right after <BlockStart>, loop through blocks with the map method and return the component:
export function Level({ count = 5, types = [ BlockSpinner, BlockAxe, BlockLimbo ] })
{
    const blocks = useMemo(() =>
    {
        const blocks = []

        for(let i = 0; i < count; i++)
        {
            const type = types[ Math.floor(Math.random() * types.length) ]
            blocks.push(type)
        }

        return blocks
    }, [ count, types ])

    return <>
        <BlockStart position={ [ 0, 0, 0 ] } />

        { blocks.map((Block) => <Block />) }
    </>
}
What a mess. Don’t worry, it’s easy to fix.
First of all, note that we use PascalCase for Block because this component is not automatically generated by React Three Fiber.
Secondly, when looping like this and creating multiple components, we need to provide a key attribute. To do that, we can use the index of the map arguments:
{ blocks.map((Block, index) => <Block key={ index } />) }Finally, all blocks ended up on top of each other because we didn’t provide a position.
To do so, add a position attribute and multiply the index by 4 for the z axis since each trap is 4 units large:
{ blocks.map((Block, index) => <Block key={ index } position={ [ 0, 0, index * 4 ] } />) }The traps are headed the wrong way. Add a - in front of the formula:
{ blocks.map((Block, index) => <Block key={ index } position={ [ 0, 0, - index * 4 ] } />) }Currently, the first trap is on top of the start block. Add 1 to index:
{ blocks.map((Block, index) => <Block key={ index } position={ [ 0, 0, - (index + 1) * 4 ] } />) }
Here are our traps and if you reload, you’ll get a new set of traps.
End block
We can finally add the end block and set its z position with this formula - (count + 1) * 4:
export function Level({ count = 5, types = [ BlockSpinner, BlockAxe, BlockLimbo ] })
{
    // ...

    return <>
        <BlockStart position={ [ 0, 0, 0 ] } />

        { blocks.map((Block, index) => <Block key={ index } position={ [ 0, 0, - (index + 1) * 4 ] } />) }

        <BlockEnd position={ [ 0, 0, - (count + 1) * 4 ] } />
    </>
}
You might notice that the shadows aren’t working at the end of the level. That’s because the shadow map of the directional light source doesn’t cover the whole level. Don’t worry about that, we will fix it later.
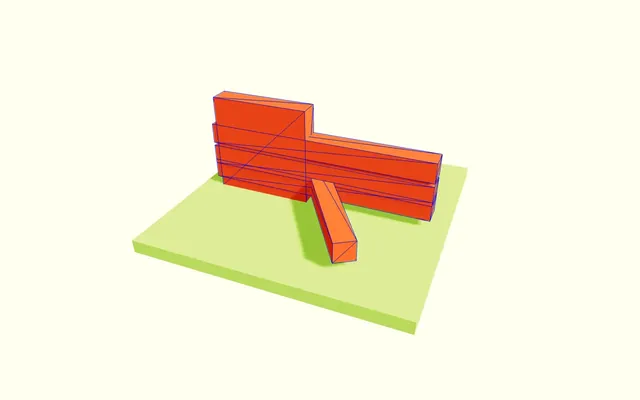
Bounds
Our level is almost done. We now need to add walls and colliders to delineate the level and prevent the player from sinking into the floor.
Component
In Level.jsx, create a Bounds function component:
function Bounds()
{
    return <>
    </>
}
Instantiate it in Level:
export function Level({ count = 5, types = [ BlockSpinner, BlockAxe, BlockLimbo ] })
{
    // ...

    return <>
        {/* ... */}

        <Bounds />
    </>
}
We want to be able to control the length of the Bounds from an attribute.
Add a length prop to the Bound component:
function Bounds({ length = 1 })
{
    return <>
    </>
}
In Level, set the length attribute to count + 2 (because count is the number of traps and we need to add the Start and the End blocks):
export function Level({ count = 5, types = [ BlockSpinner, BlockAxe, BlockLimbo ] })
{
    // ...

    return <>
        {/* ... */}

        <Bounds length={ count + 2 } />
    </>
}
Walls
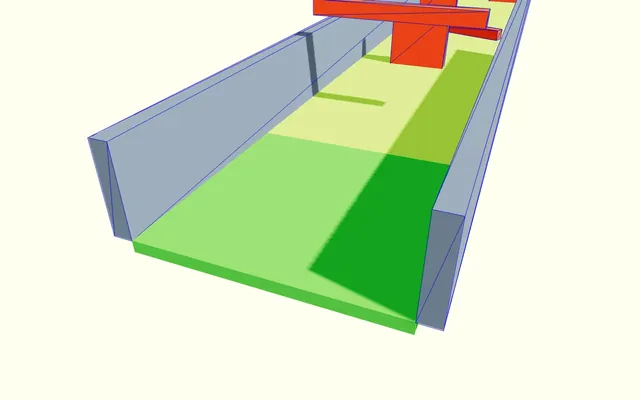
We are going to start with the wall on the right. It’s going to be 0.3 thick, 1.5 high and cover the entire level, from start to finish.
You can try to do it yourself, but to gain some time, here’s the <mesh> with the right attributes:
function Bounds({ length = 1 })
{
    return <>
        <mesh
            position={ [ 2.15, 0.75, - (length * 2) + 2 ] }
            geometry={ boxGeometry }
            material={ wallMaterial }
            scale={ [ 0.3, 1.5, 4 * length ] }
        />
    </>
}
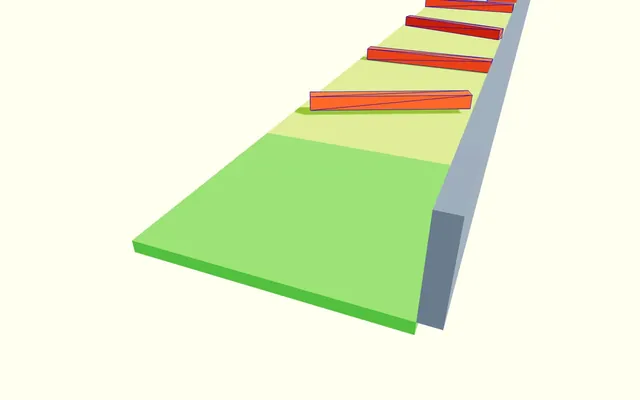
Since the light is coming from the right, only the wall on the right needs to cast shadows.
Add castShadows to the <mesh>:
<mesh
    position={ [ 2.15, 0.75, - (length * 2) + 2 ] }
    geometry={ boxGeometry }
    material={ wallMaterial }
    scale={ [ 0.3, 1.5, 4 * length ] }
    castShadow
/>
For the left wall, duplicate the right wall <mesh> and invert its x position:
function Bounds({ length = 1 })
{
    return <>
        <mesh
            position={ [ 2.15, 0.75, - (length * 2) + 2 ] }
            geometry={ boxGeometry }
            material={ wallMaterial }
            scale={ [ 0.3, 1.5, 4 * length ] }
            castShadow
        />
        <mesh
            position={ [ - 2.15, 0.75, - (length * 2) + 2 ] }
            geometry={ boxGeometry }
            material={ wallMaterial }
            scale={ [ 0.3, 1.5, 4 * length ] }
            castShadow
        />
    </>
}
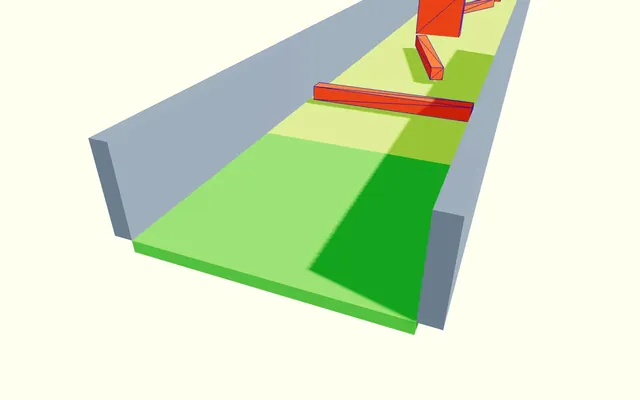
Replace the castShadow by receiveShadow:
<mesh
    position={ [ - 2.15, 0.75, - (length * 2) + 2 ] }
    geometry={ boxGeometry }
    material={ wallMaterial }
    scale={ [ 0.3, 1.5, 4 * length ] }
    receiveShadow
/>
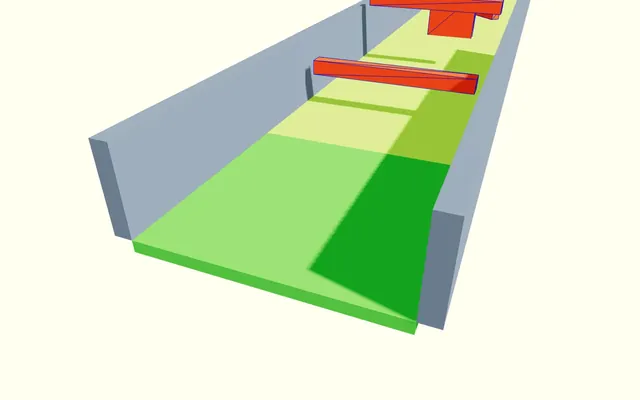
We also need a wall at the end of the level. Duplicate the left wall <mesh> and set the following coordinates:
function Bounds({ length = 1 })
{
    return <>
        <mesh
            position={ [ 2.15, 0.75, - (length * 2) + 2 ] }
            geometry={ boxGeometry }
            material={ wallMaterial }
            scale={ [ 0.3, 1.5, 4 * length ] }
            castShadow
        />
        <mesh
            position={ [ - 2.15, 0.75, - (length * 2) + 2 ] }
            geometry={ boxGeometry }
            material={ wallMaterial }
            scale={ [ 0.3, 1.5, 4 * length ] }
            receiveShadow
        />
        <mesh
            position={ [ 0, 0.75, - (length * 4) + 2] }
            geometry={ boxGeometry }
            material={ wallMaterial }
            scale={ [ 4, 1.5, 0.3 ] }
            receiveShadow
        />
    </>
}
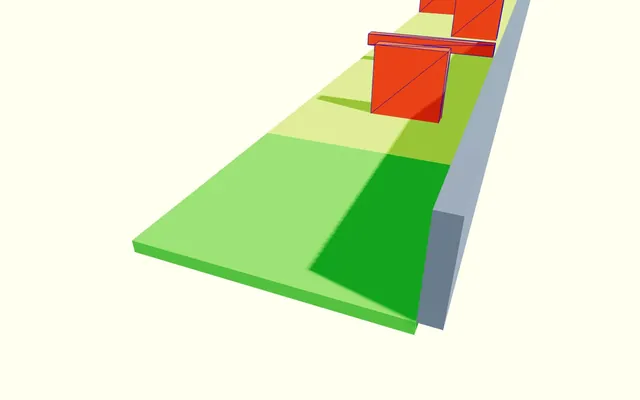
We can now wrap all three <mesh> in a <RigidBody> of the type 'fixed':
function Bounds({ length = 1 })
{
    return <>
        <RigidBody type="fixed">
            <mesh
                position={ [ 2.15, 0.75, - (length * 2) + 2 ] }
                geometry={ boxGeometry }
                material={ wallMaterial }
                scale={ [ 0.3, 1.5, 4 * length ] }
                castShadow
            />
            <mesh
                position={ [ - 2.15, 0.75, - (length * 2) + 2 ] }
                geometry={ boxGeometry }
                material={ wallMaterial }
                scale={ [ 0.3, 1.5, 4 * length ] }
                receiveShadow
            />
            <mesh
                position={ [ 0, 0.75, - (length * 4) + 2] }
                geometry={ boxGeometry }
                material={ wallMaterial }
                scale={ [ 4, 1.5, 0.3 ] }
                receiveShadow
            />
        </RigidBody>
    </>
}
React Three Rapier automatically created a cuboid collider for each <mesh>.
Set the restitution to 0.2 and set the friction to 0 on the <RigidBody>:
function Bounds({ length = 1 })
{
    return <>
        <RigidBody type="fixed" restitution={ 0.2 } friction={ 0 }>
            {/* ... */}
        </RigidBody>
    </>
}
Floor
We are forgetting one last important collider and that’s the floor.
We are going to add one <CuboidCollider> manually in the <RigidBody> and position it so that it covers the entire floor.
Import CuboidCollider from @react-three/rapier:
import { CuboidCollider, RigidBody } from '@react-three/rapier'Add it to the <RigidBody>, with a type set to 'fixed':
function Bounds({ length = 1 })
{
    return <>
        <RigidBody type="fixed" restitution={ 0.2 } friction={ 0 }>
            {/* ... */}
            <CuboidCollider args={ [ 1, 1, 1 ] } />
        </RigidBody>
    </>
}
Move it and scale it so that it covers the whole floor:
<CuboidCollider
    args={ [ 2, 0.1, 2 * length ] }
    position={ [ 0, -0.1, - (length * 2) + 2 ] }
/>
Finally, set its restitution to 0.2 and friction to 1, in order to create friction between the marble and the floor. This way, rotating the marble will make it move instead of making it drift on a smooth floor:
<CuboidCollider
    args={ [ 2, 0.1, 2 * length ] }
    position={ [ 0, -0.1, - (length * 2) + 2 ] }
    restitution={ 0.2 }
    friction={ 1 }
/>
Now, we are done with the level (for the time being).
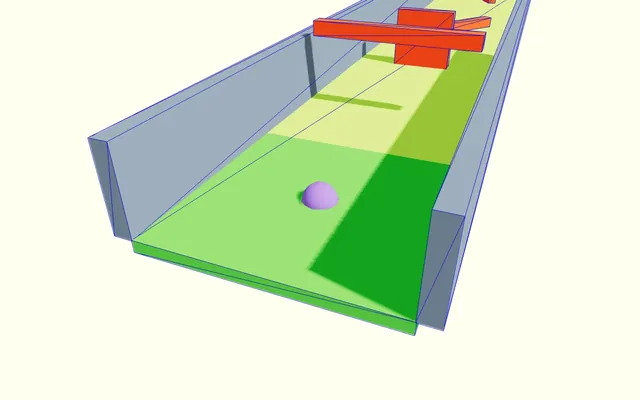
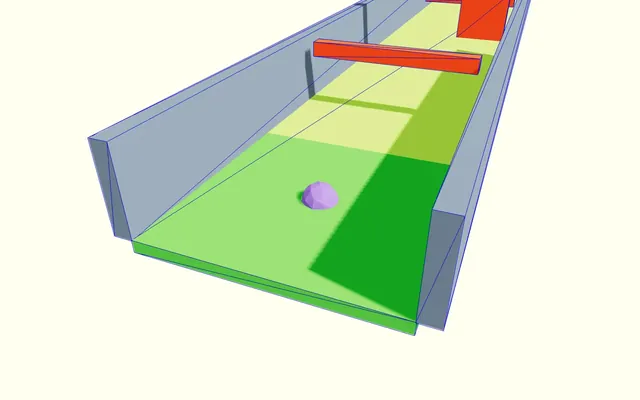
Player 01:18:13
Next in the list is the player.
As we mentioned earlier, we want to play as a marble that we move around using the keyboard.
Component
In /src/, create a Player.jsx file and export a Player function component:
export default function Player()
{
    return <>
    </>
}
In Experience, import Player and add it to the <Physics>:
import Player from './Player.jsx'

export default function Experience()
{
    return <>

        {/* ... */}

        <Physics>
            {/* ... */}
            <Player />
        </Physics>

    </>
}
Ball
For the actual marble, create a <mesh> with a <icosahedronGeometry> as the geometry and a <meshStandardMaterial> as the material. Set its color to "mediumpurple":
export default function Player()
{
    return <>
        <mesh>
            <icosahedronGeometry args={ [ 0.3, 1 ] } />
            <meshStandardMaterial color="mediumpurple" />
        </mesh>
    </>
}

Add castShadow to the <mesh> (we don’t add receiveShadow so that the sphere stays clearly visible, even in the shade):
<mesh castShadow>
    <icosahedronGeometry args={ [ 0.3, 1 ] } />
    <meshStandardMaterial color="mediumpurple" />
</mesh>
Since the sphere is going to rotate, we want the player to be able to notice that rotation. In order to improve the rotation’s visibility, we can add flatShading to the <meshStandardMaterial>:
<mesh castShadow>
    <icosahedronGeometry args={ [ 0.3, 1 ] } />
    <meshStandardMaterial flatShading color="mediumpurple" />
</mesh>
Physics
Adding physics to the ball is easy-peasy.
First, import RigidBody from @react-three/rapier:
import { RigidBody } from '@react-three/rapier'Then, wrap the <mesh> in <RigidBody>:
export default function Player()
{
    return <>
        <RigidBody>
            <mesh castShadow>
                <icosahedronGeometry args={ [ 0.3, 1 ] } />
                <meshStandardMaterial flatShading color="mediumpurple" />
            </mesh>
        </RigidBody>
    </>
}
Since the Player component won’t return anything else than the <RigidBody>, we can remove the fragment (<>...</>):
export default function Player()
{
    return <RigidBody>
        <mesh castShadow>
            <icosahedronGeometry args={ [ 0.3, 1 ] } />
            <meshStandardMaterial flatShading color="mediumpurple" />
        </mesh>
    </RigidBody>
}
Move the <RigidBody> up with its position attribute so that it starts slightly above the floor:
<RigidBody position={ [ 0, 1, 0 ] }>
    {/* ... */}
</RigidBody>
The default collider is a cuboid, which won’t be ideal if you want to make the marble roll.
Add a colliders attribute and set it to "ball":
<RigidBody colliders="ball" position={ [ 0, 1, 0 ] }>
    {/* ... */}
</RigidBody>

Set its restitution to 0.2 and friction to 1 so that the marble will bounce a little, without rubbing too much against the floor:
<RigidBody colliders="ball" restitution={ 0.2 } friction={ 1 } position={ [ 0, 1, 0 ] }>
    {/* ... */}
</RigidBody>
It’s barely noticeable, but after a few seconds, you’ll see the color of the player helper become darker. This means that the body is now sleeping and won’t be tested.
This would prevent the user from applying forces to it and our sphere would stay right here even though the user is pressing the arrow keys.
To fix it, we are going to prevent the body from sleeping by adding a canSleep attribute to false:
<RigidBody canSleep={ false } colliders="ball" restitution={ 0.2 } friction={ 1 } position={ [ 0, 1, 0 ] }>
    {/* ... */}
</RigidBody>
Controls
It’s time to add controls, allowing the player to move that marble.
In this lesson, we will only focus on desktops and the use of a keyboard. Feel free to add more support after finishing the lesson, such as device orientation or a gamepad.
In addition, we want the player to be able to use both the WASD and the arrow keys to control the direction of the marble.
Finally, we want to make the marble jump when we press the Space bar.
KeyboardControls
In React, adding keyboard controls to games used to be tedious, with various solutions that were not always suited to the task.
The good news is that there is a drei helper named KeyboardControls that will do exactly what we need.
<KeyboardControls> needs to wrap every component that has to be aware of which keys are being pressed. Later in the lesson, we are going to add an interface outside of the <Canvas> and that interface will react to the keyboard.
This means that we need the <KeyboardControls> to be set at the top level.
In index.jsx, Import KeyboardControls from @react-three/drei:
import { KeyboardControls } from '@react-three/drei'Then, wrap the <Canvas> in a <KeyboardControls> and set its map attribute to []:
root.render(
    <KeyboardControls map={ [] }>
        <Canvas
            shadows
            camera={ {
                fov: 45,
                near: 0.1,
                far: 200,
                position: [ 2.5, 4, 6 ]
            } }
        >
            <Experience />
        </Canvas>
    </KeyboardControls>
)
In that map array, we need to provide each key that we want to observe as an object with a name and the list of keys that should trigger the change as another array.
For example, we want both the ArrowUp and KeyW keys to make the player move 'forward':
<KeyboardControls
    map={ [
        { name: 'forward', keys: [ 'ArrowUp', 'KeyW' ] },
    ] }
>
    {/* ... */}
</KeyboardControls>
And we can do the same for the 'backward', 'leftward', 'rightward' and 'jump':
<KeyboardControls
    map={ [
        { name: 'forward', keys: [ 'ArrowUp', 'KeyW' ] },
        { name: 'backward', keys: [ 'ArrowDown', 'KeyS' ] },
        { name: 'leftward', keys: [ 'ArrowLeft', 'KeyA' ] },
        { name: 'rightward', keys: [ 'ArrowRight', 'KeyD' ] },
        { name: 'jump', keys: [ 'Space' ] },
    ] }
>
    {/* ... */}
</KeyboardControls>
As you can see, we are using key names like 'KeyW' instead of just 'w'. The 'w' only refers to the characters, but it doesn’t refer to the position of the key.
For a QWERTY keyboard, using 'w' instead of 'KeyW' would result in the same effect, but for non-QWERTY keyboards (like in France), it wouldn’t work since the characters aren’t positioned the same way.
Be nice to non-QWERTY keyboards; it’s hard enough as it is for us.
Make it roll
Now back to the Player.jsx file.
Since we are going to apply forces whenever the corresponding keys are being pressed, we need to do it in a useFrame.
Import useFrame from @react-three/fiber:
import { useFrame } from '@react-three/fiber'Call useFrame in Player and send it a function:
export default function Player()
{
    useFrame(() =>
    {

    })

    // ...
}
First, we need to retrieve the keys and their states.
To do that, we first need to import useKeyboardControls from @react-three/drei:
import { useKeyboardControls } from '@react-three/drei'This hook will return an array of two things:
- A function to subscribe to key changes (useful to know when the jump key has been pressed)
- A function to get the current states of the keys (useful to know if the
WASDkeys are being pressed)
Since useKeyboardControls returns an array, we can deconstruct it into subscribeKeys and getKeys:
export default function Player()
{
    const [ subscribeKeys, getKeys ] = useKeyboardControls()

    // ...
}
In useFrame, call getKeys and assign it to a keys variable and log it:
export default function Player()
{
    const [ subscribeKeys, getKeys ] = useKeyboardControls()

		useFrame(() =>
		{
		    const keys = getKeys()
		    console.log(keys)
		})

    // ...
}
Now press the various WASD or Space keys to see them turning to true in the logs.
To make it more convenient, we can destructure it and we only need forward, backward, leftward and rightward (not jump):
useFrame(() =>
{
    const { forward, backward, leftward, rightward } = getKeys()

})
In order to make the marble move, we are going to apply both a roll force and push force. This way, the player will still have some control over the trajectory, even if the marble is in the air. This is something we see a lot in video games.
To make the marble roll we are going to use applyTorqueImpulse and to push the marble we are going to use applyImpulse.
But first, we need a reference to the body.
Import useRef from react:
import { useRef } from 'react'Create a body reference:
export default function Player()
{
    const body = useRef()

    // ...
}
Assign it to the <RigidBody> with the ref attribute:
export default function Player()
{
    const body = useRef()

    // ...

    return <RigidBody ref={ body } canSleep={ false } colliders="ball" restitution={ 0.2 } friction={ 1 } position={ [ 0, 1, 0 ] }>
	      {/* ... */}
	  </RigidBody>
}
In the useFrame, create an impulse object and a torque object with their x, y and z properties set to 0:
useFrame(() =>
{
    const { forward, backward, leftward, rightward } = getKeys()

    const impulse = { x: 0, y: 0, z: 0 }
    const torque = { x: 0, y: 0, z: 0 }
})
Those are going to be the push and the roll forces. We set them to 0 so that nothing moves by default.
Apply those impulse and torque forces to the body.current with applyImpulse and applyTorqueImpulse:
useFrame(() =>
{
    const { forward, backward, leftward, rightward } = getKeys()

    const impulse = { x: 0, y: 0, z: 0 }
    const torque = { x: 0, y: 0, z: 0 }

    body.current.applyImpulse(impulse)
    body.current.applyTorqueImpulse(torque)
})
Nothing is moving because both impulse and torque are set to 0, but we can now change those values according to the keys being pressed.
To test if it’s working, you can change any value you like in the impulse:
const impulse = { x: 0.001, y: 0, z: 0 }Cool. Now the marble is moving.
Return the values to 0:
const impulse = { x: 0, y: 0, z: 0 }Before applying forces, we need to handle the variation in frame rates.
If we apply the same impulse on a computer with a higher frame rate, the marble will move faster because the applyImpulse will be called more often.
First, we need to retrieve the time spent since the last frame, which we can get from the useFrame arguments:
useFrame((state, delta) =>
{
    // ...
})
Now, we can create impulseStrength and torqueStrength variables using the delta:
useFrame((state, delta) =>
{
    const { forward, backward, leftward, rightward } = getKeys()

    const impulse = { x: 0, y: 0, z: 0 }
    const torque = { x: 0, y: 0, z: 0 }

    const impulseStrength = 1 * delta
    const torqueStrength = 1 * delta

    // ...
})
That 1 seems useless, but it’s a placeholder that we will later replace by a value to control the impulse strength and the torque strength.
Great! Now, we are ready to make the marble move.
Let’s start with the forward.
If forward is true, we want to push the marble in the -z direction (towards the end of the level):
useFrame((state, delta) =>
{
    const { forward, backward, leftward, rightward } = getKeys()

    const impulse = { x: 0, y: 0, z: 0 }
    const torque = { x: 0, y: 0, z: 0 }

    const impulseStrength = 1 * delta
    const torqueStrength = 1 * delta

    if(forward)
    {
        impulse.z -= impulseStrength
    }

    // ...
})
Pressing the W or ArrowUp keys should make the marble move.
We can now make it roll too, but it should be on the x axis:
useFrame((state, delta) =>
{
    const { forward, backward, leftward, rightward } = getKeys()

    const impulse = { x: 0, y: 0, z: 0 }
    const torque = { x: 0, y: 0, z: 0 }

    const impulseStrength = 1 * delta
    const torqueStrength = 1 * delta

    if(forward)
    {
        impulse.z -= impulseStrength
        torque.x -= torqueStrength
    }

    // ...
})
The marble is going way too fast, but we can control it by replacing the 1 in both strength variables:
useFrame((state, delta) =>
{
    // ...

    const impulseStrength = 0.6 * delta
    const torqueStrength = 0.2 * delta

    // ...
})
It’s still a bit too fast, but keep it this way, because we will use something later on that will slow down it a little.
You can now try to set the 3 other keys yourself (you might need to try the impulse and the torque parameters separately so that you can clearly see how each force is being applied):
useFrame((state, delta) =>
{
    // ...

    if(forward)
    {
        impulse.z -= impulseStrength
        torque.x -= torqueStrength
    }

    if(rightward)
    {
        impulse.x += impulseStrength
        torque.z -= torqueStrength
    }

    if(backward)
    {
        impulse.z += impulseStrength
        torque.x += torqueStrength
    }

    if(leftward)
    {
        impulse.x -= impulseStrength
        torque.z += torqueStrength
    }

    // ...
}
It’s working great, but the marble seems to be rolling almost indefinitely. The body is rubbing against the floor, but it only makes the marble rotate and continue on its path. We want the marble to slow down on its own without having to bump into walls or obstacles.
To do that, we are going to add what we call “damping” to the <RigidBody>.
The damping will reduce the forces being applied to a body and can be set for the translation and the rotation separately.
Set the linearDamping to 0.5 and the angularDamping to 0.5 on the <RigidBody>:
<RigidBody
    ref={ body }
    canSleep={ false }
    colliders="ball"
    restitution={ 0.2 }
    friction={ 1 }
    linearDamping={ 0.5 }
    angularDamping={ 0.5 }
    position={ [ 0, 1, 0 ] }
>
    {/* ... */}
</RigidBody>
And now, the marble stops on its own if you stop pressing the keys.
Make it jump
We now want the marble to jump when we press the Space bar.
This one works a bit differently because we don’t want to make it jump on each frame when the Space bar is being pressed. We want to know whenever the jump key changes and if it’s switching from the “not pressed” to “pressed” state, we make the marble jump.
To do that, we need to “subscribe” to the key value change which is the purpose of subscribeKeys that we retrieved from useKeyboardControls() earlier.
However, we want to subscribe to that event only once and we are going to use useEffect to do so.
Import useEffect from react:
import { useEffect, useRef } from 'react'Call it and send it an empty array as dependencies so that it’s called only once after the first render:
export default function Player()
{
    const body = useRef()
    const [ subscribeKeys, getKeys ] = useKeyboardControls()

    useEffect(() =>
    {

    }, [])

    // ...
}
We can now call subscribeKeys and send it two functions:
useEffect(() =>
{
    subscribeKeys(
        () =>
        {

        },
        () =>
        {

        }
    )
}, [])
In the first function, we need to retrieve the state as the argument:
useEffect(() =>
{
    subscribeKeys(
        (state) =>
        {

        },
        () =>
        {

        }
    )
}, [])
This state is an object containing all the keys that we chose when we created <KeyboardControls> (a bit like getKeys) and we are going to use it to “select” which one we want to observe by returning it:
useEffect(() =>
{
    subscribeKeys(
        (state) =>
        {
            return state.jump
        },
        () =>
        {

        }
    )
}, [])
And since the function’s only instruction is a return, we can write it as follows:
useEffect(() =>
{
    subscribeKeys(
        (state) => state.jump,
        () =>
        {

        }
    )
}, [])
What we’ve just created, is called a “selector”.
In the second function, we can write instructions that we want to be called when the value in the selector changes and we can get the actual value as the argument:
useEffect(() =>
{
    subscribeKeys(
        (state) => state.jump,
        (value) =>
        {
            console.log('Jump?', value)
        }
    )
}, [])
Press the Space bar to see the log.
We can test if the value is true, (meaning that the player wants to jump) in an if statement:
useEffect(() =>
{
    subscribeKeys(
        (state) => state.jump,
        (value) =>
        {
            if(value)
                console.log('Yes, jump!')
        }
    )
}, [])
Let’s make things convenient by writing the jump function outside of useEffect and calling it in the if statement:
export default function Player()
{
    // ...

    const jump = () =>
    {
        console.log('Yes, jump!')
    }

    useEffect(() =>
    {
        subscribeKeys(
            (state) => state.jump,
            (value) =>
            {
                if(value)
                    jump()
            }
        )
    }, [])

    // ...
}
Let’s try to make the marble jump by using applyImpulse and by sending it an x, y, z object going up:
const jump = () =>
{
    body.current.applyImpulse({ x: 0, y: 0.5, z: 0 })
}
Cool. It’s working! However, if you keep pressing the Space bar even if the marble is already in the air, it’ll keep going up to infinity and beyond.
To fix that, we are going to test how far the marble is from what’s below. And to do so, we are going to cast a ray from below the marble, downwards and see how far the collision point is.
It’s very similar to Ray casting in Three.js, but we are doing it within the Rapier world.
First, we need to set the origin of the ray. We are going to retrieve the body position with the translation method and move it down by 0.31 because the sphere radius is 0.3:
const jump = () =>
{
    const origin = body.current.translation()
    origin.y -= 0.31

    // ...
}
For the direction, we create a simple x, y, z object with the y being negative (downward):
const jump = () =>
{
    const origin = body.current.translation()
    origin.y -= 0.31
    const direction = { x: 0, y: - 1, z: 0 }

    // ...
}
To create a ray, we need to use the Rapier library directly.
There are two ways of accessing the Rapier library. First, we could import it like this (but don’t do it!):
import * as RAPIER from '@dimforge/rapier3d-compat'But you might notice that we haven’t added the @dimforge/rapier3d-compat dependency to the project. That import is working because we added @react-three/rapier and this one is using @dimforge/rapier3d-compat.
We should avoid importing libraries that haven’t been clearly added to the project because we would be relying on dependencies that we don’t really control and we’d cause the project to lack logic.
The second way is to use the useRapier hook provided by @react-three/rapier. This hook gives access to many Rapier-related elements like the physics world, physics options, and Rapier itself.
In Player.jsx, import useRapier from @react-three/rapier:
import { useRapier, RigidBody } from '@react-three/rapier'Call useRapier and destructure it to only retrieve the rapier property:
export default function Player()
{
    const body = useRef()
    const [ subscribeKeys, getKeys ] = useKeyboardControls()
    const { rapier } = useRapier()

    console.log(rapier)

    // ...
}
rapier contains all the native Rapier classes including Ray.
Now, remove the log.
In the jump function, instantiate a Ray using rapier.Ray and send it the origin and the destination:
const jump = () =>
{
    const origin = body.current.translation()
    origin.y -= 0.31
    const direction = { x: 0, y: - 1, z: 0 }
    const ray = new rapier.Ray(origin, direction)

    body.current.applyImpulse({ x: 0, y: 0.5, z: 0 })
}
Our Ray is ready to be cast and we want to test it against the whole world. To get access to the Rapier world, we can use useRapier again:
export default function Player()
{
    // ...
    const { rapier, world } = useRapier()

    console.log(world)

    // ...
}
Back to the jump function. We can call the castRay method on world, send it the ray and assign the result in a hit variable:
const jump = () =>
{
    const origin = body.current.translation()
    origin.y -= 0.31
    const direction = { x: 0, y: - 1, z: 0 }
    const ray = new rapier.Ray(origin, direction)
    const hit = world.castRay(ray)

    console.log(hit)

    // ...
}
hit is an object containing information about the ray collision. The property that we need is timeOfImpact:
const jump = () =>
{
    // ...

    console.log(hit.timeOfImpact)

    // ...
}
timeOfImpact can be seen as the distance between the ray’s origin and the hit point.
But why are we getting these values when the marble is on the floor? Shouldn’t we be getting a 0 value?
The problem is that we are casting a ray slightly below the sphere and that put the origin inside the floor collider. The ray is then cast downwards and the collision we get is with the bottom of the collider below the scene.
To fix that, we can tell the castRay method that all colliders are solid, meaning that they have matter inside so that the ray, if cast inside of a collider, will immediately hit something.
Add a 10 and a true parameter to castRay:
const hit = world.castRay(ray, 10, true)10 is the max distance for the ray. Although we don’t really care about that value, we still have to set it in order to set the next parameter, which is the solid parameter.
Before calling the applyImpulse, we can now test how close the hit was, by using hit.timeOfImpact:
const jump = () =>
{
    // ...

    if(hit.timeOfImpact < 0.15)
        body.current.applyImpulse({ x: 0, y: 0.5, z: 0 })
}
And now we can make the marble jump!
But we made a small mistake. If we apply some changes to Player, the component will be destroyed and recreated, but the function we sent to subscribeKeys will be called twice and it will make the marble jump twice as high.
You can try it yourself by making any kind of change, like adding a console.log anywhere in the Player function and testing the jump without reloading:
export default function Player()
{
    console.log('Hey!')

    // ...
}
The marble jumps twice as high because the component has been destroyed and re-created, making the useEffect being called a second time resulting in the subscribing to the event happening twice.
You might think that’s it’s no big deal since the player won’t be able to destroy the component, but it’s important to make our components robust and bug free because we don’t know how they’ll be used in the future. This way, we can also modify the Player code without having to reload the page.
We need a way to unsubscribe to the event when the component is being destroyed.
Remove the log.
First, we need to retrieve the function to unsubscribe and it’s what subscribeKeys returns:
useEffect(() =>
{
    const unsubscribeJump = subscribeKeys(
        (state) => state.jump,
        (value) =>
        {
            if(value)
                jump()
        }
    )
}
Now, we need to return a function in useEffect:
useEffect(() =>
{
    // ...

    return () =>
    {

    }
}
This function will be called when the component is being destroyed and we just need to call the unsubscribeJump:
useEffect(() =>
{
    // ...

    return () =>
    {
        unsubscribeJump()
    }
}
Making changes in the component won’t make the marble jump twice as high because we are thoroughly removing the event subscriptions.
Before going further, switch the debug attribute to false in Experience so that we can enjoy the scene:
<Physics debug={ false }>
    <Lights />
    <Level />
    <Player />
</Physics>
Camera animation 02:12:16
Next in the list, we want the camera to follow the marble.
It needs to stay behind the marble, but with a smooth animation.
OrbitControls
Since we are going to animate the camera ourselves, we can get rid of the OrbitControls.
In Experience, remove or comment the <OrbitControls> and its import:
{/* <OrbitControls makeDefault /> */}Position and target
Our first priority is not to take care of the smoothing. Instead, we are going to define where the camera should be and what it should be looking at.
And since this is to be done on each frame and related to the marble, we are going to do it in the useFrame of the Player component:
export default function Player()
{
    // ...

    useFrame((state, delta) =>
    {
        /**
         * Controls
         */
        // ...

        /**
         * Camera
         */
        // Here
    })

    // ...
}
Retrieve the position of the body (the marble) with translation():
useFrame((state, delta) =>
{
    // ...

    const bodyPosition = body.current.translation()

    console.log(bodyPosition)
})
Remove the log
Import Three.js as THREE from three:
import * as THREE from 'three'Create a cameraPosition variable using a Vector3:
useFrame((state, delta) =>
{
    // ...

    const bodyPosition = body.current.translation()

    const cameraPosition = new THREE.Vector3()
})
Copy the values from the bodyPosition to the cameraPosition using the copy method and move it backwards and upwards a little:
useFrame((state, delta) =>
{
    // ...

    const bodyPosition = body.current.translation()

    const cameraPosition = new THREE.Vector3()
    cameraPosition.copy(bodyPosition)
    cameraPosition.z += 2.25
    cameraPosition.y += 0.65
})
We also need to set a Vector3 for where the camera is going to look and we want it to focus its attention slightly above the marble.
Create a cameraTarget variable like we did for the cameraPosition and increase the y:
useFrame((state, delta) =>
{
    // ...

    const cameraTarget = new THREE.Vector3()
    cameraTarget.copy(bodyPosition)
    cameraTarget.y += 0.25
})
Ok, the coordinates are ready. Still, we are missing the main guest: our camera!
Since we are in a useFrame, we can access the camera by adding a state argument to the function, which we already did because we needed to access the delta:
useFrame((state, delta) =>
{
    // ...
})
We can copy the cameraPosition variable to the state.camera.position and ask the camera to lookAt the cameraTarget:
useFrame((state, delta) =>
{
    // ...

    state.camera.position.copy(cameraPosition)
    state.camera.lookAt(cameraTarget)
})
Smoothed animation
Yes: it’s working! But the animation is still a bit too rough. We need to smooth the animation and we are going to do it as we did in the Scroll Based Animation lesson by “lerping” the value.
Without going into detail, the main idea is that, on each frame, the camera will get slightly closer to where it’s supposed to be and it’ll keep doing that on each frame.
First, we need to create two Vector3 outside of the useFrame because they’ll contain the position and target of the camera through time. To do that, we can use useState.
Import useState from react:
import { useState, useEffect, useRef } from 'react'At the beginning of Player, create two states (smoothedCameraPosition and smoothedCameraTarget) with each one returning a THREE.Vector3:
export default function Player()
{
    // ...
    const [ smoothedCameraPosition ] = useState(() => new THREE.Vector3())
    const [ smoothedCameraTarget ] = useState(() => new THREE.Vector3())

    // ...
}
As we discussed in our previous lesson, creating a variable with this kind of useState returns a value and this value will be preserved for that instance of the component.
Back to the useFrame, to do the lerping (or linear interpolation), we can use the lerp function on Vector3:
useFrame((state, delta) =>
{
    // ...

    smoothedCameraPosition.lerp(cameraPosition, 0.1)
    smoothedCameraTarget.lerp(cameraTarget, 0.1)

    state.camera.position.copy(cameraPosition)
    state.camera.lookAt(cameraTarget)
})
0.1 means that the value will get 1/10 closer to the destination.
And then we still need to copy the smoothed coordinates to the camera:
useFrame((state, delta) =>
{
    // ...

    state.camera.position.copy(smoothedCameraPosition)
    state.camera.lookAt(smoothedCameraTarget)
})
The camera animation is a lot smoother, but we’ve made a small mistake.
We haven’t coded a time-based animation, meaning that devices with different frame rates will have different results. High frame rate devices will have the camera following the marble more closely than low frame rate devices.
We can fix that by multiplying the lerping ratio by delta and increasing it to 5 (because delta is a small number below 1):
useFrame((state, delta) =>
{
    // ...

    smoothedCameraPosition.lerp(cameraPosition, 5 * delta)
    smoothedCameraTarget.lerp(cameraTarget, 5 * delta)

    // ...
})
Initial position
Our camera animation is smoothed and nice, but, when starting the experience, the camera seems to come from the floor. Although that’s no big deal, it is the opportunity to do better.
We are going to change the initial position of the camera, ensuring that it’s positioned further away from the level and the marble. This way, the player gets an overview of the level.
Set the initial smoothedCameraPosition to a position further away:
export default function Player()
{
    // ...
    const [ smoothedCameraPosition ] = useState(() => new THREE.Vector3(10, 10, 10))
    const [ smoothedCameraTarget ] = useState(() => new THREE.Vector3())

   // ...
}
Shadow 02:24:38
Now that we can play through the whole level, you might have noticed that the shadow stops after a few traps.
As we discussed in previous lessons, the shadow is being rendered by an orthographic camera positioned where the directional light is. Unfortunately, that camera has limitations and making the shadow map bigger will reduce its quality.
To fix this shadow issue, we are going to make the directional light follow the player.
The code related to the lights is located in the Light.jsx file and you can see that some parameters have already been set on the <directionalLight>:
<directionalLight
    castShadow
    position={ [ 4, 4, 1 ] }
    intensity={ 1.5 }
    shadow-mapSize={ [ 1024, 1024 ] }
    shadow-camera-near={ 1 }
    shadow-camera-far={ 10 }
    shadow-camera-top={ 10 }
    shadow-camera-right={ 10 }
    shadow-camera-bottom={ - 10 }
    shadow-camera-left={ - 10 }
/>
First, we need a reference to the <directionalLight>.
In Lights.jsx, import useRef from react:
import { useRef } from 'react'Create a light reference and assign it to the <directionalLight> with the ref attribute:
export default function Lights()
{
    const light = useRef()

    return <>
        <directionalLight
            ref={ light }
            // ...
        />
        <ambientLight intensity={ 0.5 } />
    </>
}
We are going to move the light on each frame.
Import useFrame from @react-three/fiber:
import { useFrame } from '@react-three/fiber'Call useFrame in the Light function and retrieve the state argument because we need access to the default camera:
export default function Lights()
{
    const light = useRef()

    useFrame((state) =>
    {

    })

    // ...
}
Since the level is on the z axis, we are only going to move the camera on that axis:
useFrame((state) =>
{
    light.current.position.z = state.camera.position.z + 1
})
Not the result we were expecting.
Furthermore, if you look at the marble’s shadow and move around, you’ll see that the light seems to be changing its orientation.
And this is because we moved the light but not the light’s target, which is still at the center of the scene.
Update the light target the same way:
useFrame((state) =>
{
    light.current.position.z = state.camera.position.z + 1
    light.current.target.position.z = state.camera.position.z
})
Same result? Well, the reason is that changing the target, does not mean the transformation matrix is automatically updated.
Three.js updates object matrices only if their transformation coordinates (position, rotation, scale) change and are in the scene. Yes, the light is in the scene, but not the target.
There are two solutions to fix that. We can add the target to the scene or we can update the matrix ourselves.
Let’s update the matrix of the target ourselves with the updateMatrixWorld method:
useFrame((state) =>
{
    light.current.position.z = state.camera.position.z + 1
    light.current.target.position.z = state.camera.position.z
    light.current.target.updateMatrixWorld()
})
Great, the shadow map is following the camera and the light direction doesn’t change, but we can do better.
Currently, the light is focusing on the camera, meaning that a significant part of the shadow map is used behind the camera, which is a waste.
We can fix that by moving the light and target forward a little with - 4:
useFrame((state) =>
{
    light.current.position.z = state.camera.position.z + 1 - 4
    light.current.target.position.z = state.camera.position.z - 4
    light.current.target.updateMatrixWorld()
})
Interface 02:33:28
The game is working, but we are missing crucial game mechanics, like a goal, being able to restart, etc.
But first, we need to add an interface.
This interface will be composed of 3 things:
- A timer
- A restart button
- A keyboard interface showing the
WASDkeys and theSpacebar
Component
The interface will be done in HTML on top of the <canvas>. Using HTML for the interface is very straightforward and React makes it even easier to have the displayed information adapt to the data.
First, in /src/, create an Interface.jsx file and export an Interface function component:
export default function Interface()
{
    return null
}
In index.jsx import Interface:
import Interface from './Interface.jsx'Instantiate <Interface> after the <Canvas>, but inside of the <KeyboardControls> so that we have access to the keys from the Interface component:
root.render(
    <KeyboardControls
        // ...
    >
        <Canvas
            // ...
        >
            <Experience />
        </Canvas>
        <Interface />
    </KeyboardControls>
)
In Interface.jsx, return a <div> with an interface class using the className attribute:
export default function Interface()
{
    return <div className="interface">
    </div>
}
For the CSS, we are going to keep things simple and write traditional CSS in the /src/style.css file.
In /src/style.css, select .interface, and make it fill the viewport:
/**
 * Interface
 */
.interface
{
    position: fixed;
    top: 0;
    left: 0;
    width: 100%;
    height: 100%;
}
You can’t see the interface because it’s transparent and there is nothing in the <div>, yet the .interface is there.
Deactivate cursor events with pointer-events: none;:
.interface
{
    /* ... */
    pointer-events: none;
}
Font
For the font, let’s use Bebas Neue from Google Fonts.
Add the following code to the /public/index.html file in the <head>:
<!DOCTYPE html>
<html lang="en">
<head>
    <!-- ... -->

    <link rel="preconnect" href="https://fonts.googleapis.com">
    <link rel="preconnect" href="https://fonts.gstatic.com" crossorigin>
    <link href="https://fonts.googleapis.com/css2?family=Bebas+Neue&display=swap" rel="stylesheet">
</head>
<body>
    <!-- ... -->
</body>
</html>
Now, in the CSS add the font to the .interface with a font-family so that any child will have that font:
.interface
{
    /* ... */
    font-family: 'Bebas Neue', cursive;
}
Feel free to change the font if you don’t like it. I’m bad at choosing fonts.
Time
We want to display a stopwatch so that the player knows how long it takes to finish the level.
For now, we will only display 0.00 in it, but later on, that time will be updated according to what the player is doing.
In Interface, add a <div> with a time class and write 0.00 in it:
<div className="interface">

    {/* Time */}
    <div className="time">0.00</div>

</div>
In the CSS, add the following code:
/**
 * Time
 */
.time
{
    position: absolute;
    top: 15%;
    left: 0;
    width: 100%;
    color: #ffffff;
    font-size: 6vh;
    background: #00000033;
    padding-top: 5px;
    text-align: center;
}
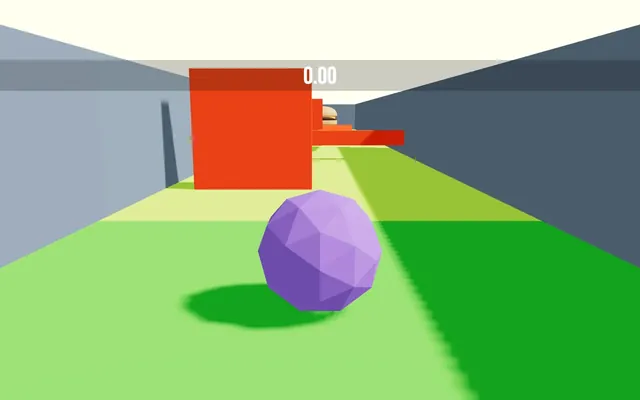
We are not going to go into detail because it’s boring CSS.
Restart
Once the player has finished the level, a Restart button will show up in the middle of the screen. Clicking on it will reset the marble and the timer.
For now, we just want to create that Restart button.
In Interface, add a <div> with a restart class and write Restart in it:
<div className="interface">

    {/* ... */}

    {/* Restart */}
    <div className="restart">Restart</div>

</div>
In the CSS, add the following code:
/**
 * Restart
 */
.restart
{
    display: flex;
    justify-content: center;
    position: absolute;
    top: 40%;
    left: 0;
    width: 100%;
    color: #ffffff;
    font-size: 80px;
    background: #00000033;
    padding-top: 10px;
    pointer-events: auto;
    cursor: pointer;
}
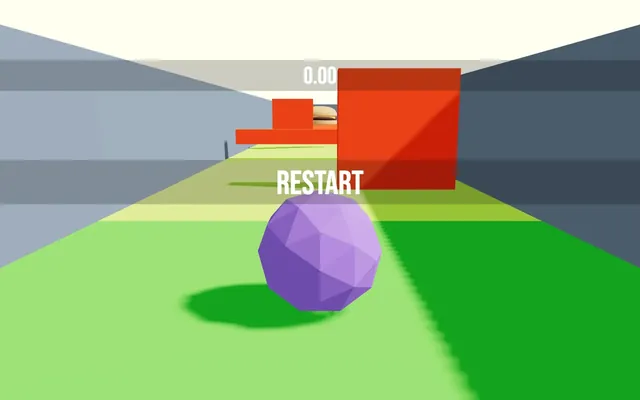
Keyboard inputs
The last piece of the interface, is slightly more complex.
We are going to display all inputs that the user can use to play the game, meaning the WASD keys and the Space bar.
This will help the user understand how the game should be played. On top of that, it’s also an opportunity to have some fun because we are going to make sure those inputs are highlighted when we press the corresponding keys.
In Interface, add the following code:
<div className="interface">

    {/* ... */}

    {/* Controls */}
    <div className="controls">
        <div className="raw">
            <div className="key"></div>
        </div>
        <div className="raw">
            <div className="key"></div>
            <div className="key"></div>
            <div className="key"></div>
        </div>
        <div className="raw">
            <div className="key large"></div>
        </div>
    </div>

</div>
In the CSS, add the following code:
/**
 * Controls
 */
.controls
{
    position: absolute;
    bottom: 10%;
    left: 0;
    width: 100%;
}

.controls .raw
{
    display: flex;
    justify-content: center;
}

.controls .key
{
    width: 40px;
    height: 40px;
    margin: 4px;
    border: 2px solid #ffffff;
    background: #ffffff44;
}

.controls .key.large
{
    width: 144px;
}

.controls .key.active
{
    background: #ffffff99;
}
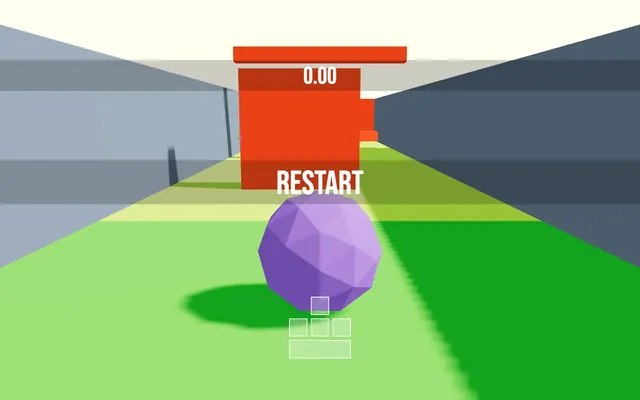
Again, we are not going to go into detail as far as the CSS is concerned, but note that, if the .key also has an active class, the background opacity will be higher. This means that we need to add the active class to the keys to make sure they are highlighted.
And we can already make those keys react to the user inputs.
In Interface.jsx, import useKeyboardControls from @react-three/drei
import { useKeyboardControls } from '@react-three/drei'Previously, we used useKeyboardControls to retrieve a subscriber and a getter. Now, we are going to use it to retrieve the keys but as reactive data.
In Interface, we can retrieve all inputs by coding the following:
export default function Interface()
{
    const controls = useKeyboardControls((state) => state)

    console.log(controls)

    // ...
}
controls is an object containing all inputs as properties where each property is true or false, depending on whether or not the key is pressed.
The parameter we sent is a function receiving the state as a parameter and we are returning that state.
If we were to write it fully, it would look something like this:
export default function Interface()
{
    const controls = useKeyboardControls((state) =>
    {
        return state
    })

    console.log(controls)

    // ...
}
And we already saw that earlier, when retrieving the controls in Player.jsx with getKeys. This is a selector and we are asking it to retrieve everything if anything changes in the state.
It’s preferable to only select the data that we truly need to prevent unwanted re-renders.
And we can do that by defining a specific selector for each key:
export default function Interface()
{
    const forward = useKeyboardControls((state) => state.forward)
    const backward = useKeyboardControls((state) => state.backward)
    const leftward = useKeyboardControls((state) => state.leftward)
    const rightward = useKeyboardControls((state) => state.rightward)
    const jump = useKeyboardControls((state) => state.jump)

    console.log(forward, backward, leftward, rightward, jump)

    // ...
}
Let’s keep the inputs separated like this and remove the log.
We now need to add an active class to the different .key if the corresponding variable is true.
First, replace the .key className with backticks versions so that we can concatenate:
<div className="controls">
    <div className="raw">
        <div className={ `key` }></div>
    </div>
    <div className="raw">
        <div className={ `key` }></div>
        <div className={ `key` }></div>
        <div className={ `key` }></div>
    </div>
    <div className="raw">
        <div className={ `key large` }></div>
    </div>
</div>
And now, we inject the active class if the corresponding variable is true:
<div className="controls">
    <div className="raw">
        <div className={ `key ${ forward ? 'active' : '' }` }></div>
    </div>
    <div className="raw">
        <div className={ `key ${ leftward ? 'active' : '' }` }></div>
        <div className={ `key ${ backward ? 'active' : '' }` }></div>
        <div className={ `key ${ rightward ? 'active' : '' }` }></div>
    </div>
    <div className="raw">
        <div className={ `key large ${ jump ? 'active' : '' }` }></div>
    </div>
</div>
The controls are reacting to what the user is doing.
Game mechanics 02:52:15
We almost have a working game, but it’s not a real game if the basic mechanics don’t work.
- We need the restart button to be clickable and only be visible when we finish the level.
- We need the timer to display accurate information.
- We need to reset the marble if it falls out of the map
- Etc.
Global state
These mechanics concern multiple components. For example, the Interface has a Restart button and clicking on it should reset the marble, but the marble is set in the Player component.
This means that we need a way to have information and methods from all of these components at our disposal.
We are going to implement what we call a global state.
Zustand
They are multiple solutions to create a global state, but the most appropriate is Zustand.
Zustand is being developed by the PMNDRS collective (them again!). It’s one of the simplest state managers and it works perfectly with R3F, which is not the case for all the state managers.
By the way, KeyboardControls is using Zustand and you’ll see similar usage, such as how to retrieve specific data without re-rendering the component needlessly or how to subscribe to data changes.
First add Zustand to the dependencies by running npm install zustand@4.5 in the terminal (we force the version to prevent surprises; you can ignore potential vulnerability warnings).
Create a store
Global states (and more specifically the one we are creating here) are commonly called stores and it’s good practice to create them in a separate file.
Although we are going to have only one store, we are going to put it in a folder.
In /src/ create a stores/ folder.
In that /src/stores/ folder, create a useGame.jsx file (although .js would have do the trick since we are not going to write JSX inside).
As you can see, the name of the file looks like the name of a React hook (starting with use) and that’s because we are going to use it like a React hook.
In useGame.jsx, import create from zustand:
import { create } from 'zustand'Call create and export the result as default:
import { create } from 'zustand'

export default create()
To that create function, we need to send a function that will return our store data as an object:
import { create } from 'zustand'

export default create(() =>
{
    return {}
})
And the first data we are going to store, is the number of blocks we want in our level with a blocksCount property set to 3:
import { create } from 'zustand'

export default create(() =>
{
    return {
        blocksCount: 3
    }
})
In Experience.jsx, import the useGame store:
import useGame from './stores/useGame.jsx'In the Experience component, retrieve the blocksCount data by calling useGame and sending it a function (this code won’t work just yet):
export default function Experience()
{
    const blocksCount = useGame(() => {})

    // ...
}
That function will have the data available as the state argument:
export default function Experience()
{
    const blocksCount = useGame((state) => {})

    // ...
}
And to select specific data (blocksCount in our case), we need to return that property from the state:
export default function Experience()
{
    const blocksCount = useGame((state) => { return state.blocksCount })

    // ...
}
And since we are using an arrow function, we can remove the (), the {} and the return:
export default function Experience()
{
    const blocksCount = useGame((state) => state.blocksCount)

    // ...
}
This is how we select a very specific value from the store and that’s exactly the same technique we used for the controls. Remember that KeyboardControls uses Zustand internally.
If that value changes (we are going to cover how later), the component will re-render, which is why it’s better to only select the data that you truly need in the component.
We can now use blocksCount on the count property of <Level /> in Experience:
<Level count={ blocksCount } />

The level now contains only 3 traps. It’s obviously too short and not a lot of fun, but we will increase the number of traps once the mechanics are set.
Phases
We saw how to set a simple property in our store and retrieve it, but let’s see how we can update properties.
We are going to achieve that properties update with the phase property, which will contain the current phase.
- When we start the game,
phasewill be set to'ready'. - When we start playing by using any of the
WASDorSpacekeys,phasewill be set to'playing'. - And when we reach the end of the level,
phasewill be set to'ended'.
This way, at any time and anywhere, we can be aware of the current phase and decide what to do.
First, add a phase property to the store and set it to 'ready':
export default create(() =>
{
    return {
        blocksCount: 3,

        /**
         * Phases
         */
        phase: 'ready'
    }
})
We now want to update that phase property whenever necessary.
Updating the store state can be done through methods directly added to that store. A method is a simple property to which we assign a function.
Add a start method:
export default create(() =>
{
    return {
        blocksCount: 3,

        /**
         * Phases
         */
        phase: 'ready',

        start: () =>
        {

        }
    }
})
In this start method, we need to update the state so that phase goes from 'ready' to 'playing'. Updating the state can be done with the set function that can be retrieved as an argument of the function we sent earlier to create():
export default create((set) =>
{
    // ...
})
We can now use that set function and send it the new state.
That new state needs to be an object whose properties will replace previous properties. In our case, we only want to replace the phase property:
export default create((set) =>
{
    return {
        // ...

        start: () =>
        {
            set(() =>
            {
                return { phase: 'playing' }
            })
        }
    }
})
This might look a bit far-fetched, but later, we will add more instructions to the methods. It also encapsulates the logic of the store in itself, as you’ll see later.
Let’s do the same with a restart and an end method:
export default create((set) =>
{
    return {
        // ...

        start: () =>
        {
            set(() =>
            {
                return { phase: 'playing' }
            })
        },

        restart: () =>
        {
            set(() =>
            {
                return { phase: 'ready' }
            })
        },

        end: () =>
        {
            set(() =>
            {
                return { phase: 'ended' }
            })
        }
    }
})
Start
We want to go from the 'ready' phase to the 'playing' phase whenever the user presses any of the control keys.
In Player.jsx we already have subscribed to the jump key in the useEffect.
To subscribe to any key, we use the same instruction, but we only send the function to execute without a selector:
export default function Player()
{
    // ...

    useEffect(() =>
    {
        const unsubscribeJump = subscribeKeys(
            // ...
        )

        subscribeKeys(
            () =>
            {
                console.log('any key down')
            }
        )

        // ...
    }, [])

    // ...
}
Don’t forget to retrieve the unsubscribe and to call it in the destroy function:
useEffect(() =>
{
    // ...
    const unsubscribeAny = subscribeKeys(
        // ...
    )

    return () =>
    {
        unsubscribeJump()
        unsubscribeAny()
    }
}, [])
We now need to retrieve the start method from the store and we can do it exactly as we did for the blocksCount.
In Player.jsx, import the useGame store:
import useGame from './stores/useGame.jsx'Retrieve the start method by calling useGame with a selector:
export default function Player()
{
    // ...
    const start = useGame((state) => state.start)

    // ...
}
Call start from the previously called subscribeKeys():
useEffect(() =>
{
    // ...
    const unsubscribeAny = subscribeKeys(
        () =>
        {
            start()
        }
    )
		// ...
}, [])
We might not see any difference, but the state is now 'playing' whenever we start moving the marble.
End
Let’s do the same for the end method. We are going to retrieve the method and call it when the marble reaches the end of the level.
Retrieve the end method as we did for the start method:
export default function Player()
{
    // ...
    const start = useGame((state) => state.start)
    const end = useGame((state) => state.end)

    // ...
}
To verify whether or not the player has reached the end, we first need to know the length of the level, which is something we can calculate with blocksCount.
Retrieve the blocksCount from the store:
export default function Player()
{
    // ...
    const start = useGame((state) => state.start)
    const end = useGame((state) => state.end)
    const blocksCount = useGame((state) => state.blocksCount)

    // ...
}
We are going to test the position of the marble on each frame, which is something we’ve already retrieved in useFrame as bodyPosition.
At the end of the useFrame, test if the bodyPosition is at the end of the level. Since we already know the size of each block (4), we can easily calculate it :
useFrame((state, delta) =>
{
    // ...

    /**
     * Phases
     */
    if(bodyPosition.z < - (blocksCount * 4 + 2))
        console.log('the end')
})
We can call the end method:
useFrame((state, delta) =>
{
    // ...

    /**
     * Phases
     */
    if(bodyPosition.z < - (blocksCount * 4 + 2))
        end()
})
Again, we can’t see any difference, but the state is now 'ended' whenever we reach the end block.
Restart
We want the marble to reset when we press the Restart button, but also when the marble leaves the level. We are going to focus on the latter for now.
The instruction is almost exactly the same as for the end method.
Retrieve the restart method as we did for the start and end methods:
export default function Player()
{
    // ...
    const start = useGame((state) => state.start)
    const end = useGame((state) => state.end)
    const restart = useGame((state) => state.restart)
    // ...
}
In the useFrame, we can test if the user felt if the bodyPosition.y is below - 4:
useFrame((state, delta) =>
{
    // ...

    /**
     * Phases
     */
    if(bodyPosition.z < - (blocksCount * 4 + 2))
        end()

    if(bodyPosition.y < - 4)
        console.log('AAAAHHHH!!!')
})
In the useFrame, call restart if the bodyPosition is below - 4
useFrame((state, delta) =>
{
    // ...

    /**
     * Phases
     */
    if(bodyPosition.z < - (blocksCount * 4 + 2))
        end()

    if(bodyPosition.y < - 4)
        restart()
})
Limit phase changes
Currently, the store is being updated a lot when keys are being pressed and on each frame when the marble reaches the end of the level.
When calling set, we want to limit those changes in the store. That’s why we are also going to test if the current phase allows the change.
Let’s start with the start method in the useGame store.
First, in the set call, we need a way to know what the current phase is. To do that, we can add a state argument to the function:
start: () =>
{
    set((state) =>
    {
        return { phase: 'playing' }
    })
},
state contains the same state that we have been using.
We can use it to test the phase.
If it’s 'ready', we return the object with a phase to 'playing'; otherwise, we return an empty object (because set needs to return something):
start: () =>
{
    set((state) =>
    {
        if(state.phase === 'ready')
            return { phase: 'playing' }

        return {}
    })
},
This function can be simplified drastically, but let’s keep it long and clear for now.
We can do the same for the restart and change it only if the phase is 'playing' or 'ended':
restart: () =>
{
    set((state) =>
    {
        if(state.phase === 'playing' || state.phase === 'ended')
            return { phase: 'ready' }

        return {}
    })
},
And the same for end if the phase is 'playing':
end: () =>
{
    set((state) =>
    {
        if(state.phase === 'playing')
            return { phase: 'ended' }

        return {}
    })
}
Reset the ball
Our phases are ready and changing when they should. We now need the game to react to those phase changes.
First, let’s focus on resetting the marble if the player’s marble leaves the level.
In Player.jsx, create a reset function:
export default function Player()
{
    // ...

    const reset = () =>
    {
        console.log('reset')
    }

    // ...
}
We want to call that function whenever the phase changes to 'ready'.
Subscribe
To do that, we need to subscribe to the changes on the store.
But our store currently doesn’t allow subscribing, which is why we need to use a Zustand middleware.
In useGame, import subscribeWithSelector from zustand/middleware:
import { subscribeWithSelector } from 'zustand/middleware'subscribeWithSelector is a function and we need to wrap the function we sent to create in it (be careful where you put the parentheses):
export default create(subscribeWithSelector((set) =>
{
    // ...
}))
Back to Player.jsx, we can now subscribe to the phase changes by calling useGame.subscribe and the parameters are the same as for the key controls subscription:
- A selector (the property we want to observe)
- A function to call when the property changes
And we need to do that only once in the useEffect:
export default function Player()
{
    // ...

    useEffect(() =>
    {
        useGame.subscribe(
            (state) => state.phase,
            (value) =>
            {
                console.log('phase changes to', value)
            }
        )

        // ...
   })
}
Just like with the controls, we need to unsubscribe by saving the unsubscribe function in a unsubscribeReset variable and calling it in the return function:
export default function Player()
{
    // ...

    useEffect(() =>
    {
        const unsubscribeReset = useGame.subscribe(
            // ...
        )

        // ...

        return () =>
        {
            unsubscribeReset()
            // ...
        }
   })
}
We can now test if the value (the phase) is 'ready' and call the reset function:
export default function Player()
{
    // ...

    useEffect(() =>
    {
        const unsubscribeReset = useGame.subscribe(
            (state) => state.phase,
            (value) =>
            {
                if(value === 'ready')
                    reset()
            }
        )

        // ...
   })
}
Once the player’s marble leaves the level (by falling), the log should appear.
In the reset function, we are going to call three functions on the body reference in order to reset the marble:
setTranslationto put it back at the originsetLinvelto remove any translation forcesetAngvelto remove any angular force
const reset = () =>
{
    body.current.setTranslation({ x: 0, y: 1, z: 0 })
    body.current.setLinvel({ x: 0, y: 0, z: 0 })
    body.current.setAngvel({ x: 0, y: 0, z: 0 })
}
Falling from the level should result in the marble being put back at the beginning.
Toggle Restart button
Currently, the Restart button is always visible and clicking on it doesn’t do anything.
Reset on click
First, let’s reset the marble whenever we click on it.
In Interface.jsx, import the useGame store:
import useGame from './stores/useGame.jsx'Retrieve the restart method by calling useGame with a selector:
export default function Interface()
{
    const restart = useGame((state) => state.restart)

    // ...
}
Send restart to the onClick attribute of the .restart <div>:
<div className="restart" onClick={ restart }>Restart</div>Move the marble a little, click on the Restart button and the marble should reset.
Display when ended
We also want the Restart button to be displayed only when the player finishes the level.
To do that, we need to know the current phase:
In Interface.jsx, retrieve the phase property by calling useGame with a selector:
export default function Interface()
{
    const restart = useGame((restart) => state.restart)
    const phase = useGame((state) => state.phase)

    // ...
}
Now make the .restart <div> visible only when phase equals 'ended':
{ phase === 'ended' && <div className="restart" onClick={ restart }>Restart</div> }Time
We are almost done with the game mechanics, but we are missing a very important feature. We need to time the user.
The time is already being displayed in the interface as 0.00. We want it to start as soon as the player starts moving the marble (when phase goes to 'playing') and stop when the marble reaches the end of the level (when phase goes to 'ended'). Finally, we want it to reset to 0.00 when the user restarts the level.
We could save the elapsed time in the store by sending the delta time on each frame, but doing so might trigger unwanted component re-renders on each frame, especially if we are retrieving the whole state without selectors (even though we avoided doing so).
Instead, we are going to save the start time when we start playing and save the end time when we finish the level.
In the interface, if the phase is 'playing', we display the elapsed time on each frame and if phase is 'ended', we display the elapsed time between the start and the end.
Don’t worry if it’s a bit fuzzy, it’ll make sense once we do it.
Set the store
First, add startTime and endTime properties to the useGame store:
export default create(subscribeWithSelector((set) =>
{
    return {
        // ...

        /**
         * Time
         */
        startTime: 0,
        endTime: 0,

        // ...
    }
}))
While setting the new phase in the start method, also set the startTime using Date.now():
start: () =>
{
    set((state) =>
    {
        if(state.phase === 'ready')
            return { phase: 'playing', startTime: Date.now() }

        return {}
    })
},
While setting the new phase in the end method, also set the endTime using Date.now():
end: () =>
{
    set((state) =>
    {
        if(state.phase === 'playing')
            return { phase: 'ended', endTime: Date.now() }

        return {}
    })
}
Update the Interface
Now, in Interface.jsx, we want to display the time according to the phase, startTime and endTime.
But there is a catch. We want to update the time on each frame so that the player sees the performance displayed while playing. You might think of using useFrame for that, but unfortunately, useFrame can only be used inside the <Canvas>, which is not the case for the <Interface>.
Also, we don’t want to re-render the Interface component on each frame. We just want to update the .time ourselves and retrieve the store values directly without any reactive behaviour.
To start with, since we want to update the .time directly, we need a reference.
In Interface.jsx, import useRef from react:
import { useRef } from 'react'Create a time reference:
export default function Interface()
{
    const time = useRef()

    // ...
}
Assign it to the .time <div> with the ref attribute:
<div ref={ time } className="time">0.00</div>We want to be able to update that time on each frame. In native JavaScript, we would have to use a requestAnimationFrame and it’s possible to do that in React. However, R3F already took care of it for us with the addEffect hook that can be used outside of <Canvas> and that will be executed synchronously with the useFrame.
Import addEffect from @react-three/fiber:
import { addEffect } from '@react-three/fiber'We only want to call addEffect once. To do that, we can use useEffect.
Import useEffect from react:
import { useEffect, useRef } from 'react'In Interface, call useEffect, send it a function and an empty array as dependencies:
export default function Interface()
{
    // ...

    useEffect(() =>
    {

    }, [])

    // ...
}
In that function, call addEffect and send it a function too:
export default function Interface()
{
// ...
useEffect(() =>
{
addEffect(() =>
{
console.log('tick')
})
}, [])
// ...
}As you can see, the function is being called on each frame.
But we made a small mistake. If we apply changes to Interface, the component will be destroyed and recreated, but the function we sent to addEffect will keep being called on each frame.
We need to stop it when the Interface component is being destroyed and we can do that as we did with the useEffect in Player.jsx.
First, we retrieve the unsubscribe function of addEffect in an unsubscribeEffect variable:
useEffect(() =>
{
const unsubscribeEffect = addEffect(() =>
{
console.log('tick')
})
}, [])Then we return a function in useEffect and we call the unsubscribeEffect in it:
useEffect(() =>
{
const unsubscribeEffect = addEffect(() =>
{
console.log('tick')
})
return () =>
{
unsubscribeEffect()
}
}, [])Once again, we could have made this code a lot shorter, but we’re doing it this way to keep things clear.
Next, in addEffect, we need to access the store state, but we don’t want to access it in the usual reactive way. We just want to retrieve the values.
To do that, we can call getState on useGame:
useEffect(() =>
{
const unsubscribeEffect = addEffect(() =>
{
const state = useGame.getState()
console.log(state)
})
// ...
}, [])And we now have access to the whole state, which we can use to calculate the elapsedTime.
Create an elapsedTime variable and set it to 0 by default. If the phase is 'playing', we subtract startTime from the current time and if the phase is 'ended' we subtract startTime from the endTime:
useEffect(() =>
{
const unsubscribeEffect = addEffect(() =>
{
const state = useGame.getState()
let elapsedTime = 0
if(state.phase === 'playing')
elapsedTime = Date.now() - state.startTime
else if(state.phase === 'ended')
elapsedTime = state.endTime - state.startTime
})
// ...
}, [])We need to divide elapsedTime by 1000 because it currently contains milliseconds, whereas we want seconds:
useEffect(() =>
{
const unsubscribeEffect = addEffect(() =>
{
// ...
elapsedTime /= 1000
})
// ...
}, [])We only want two decimals and we can do that with toFixed:
useEffect(() =>
{
const unsubscribeEffect = addEffect(() =>
{
// ...
elapsedTime = elapsedTime.toFixed(2)
})
// ...
}, [])And finally, we update .time using the reference directly, but before doing so, we need to make sure that time.current isn’t null (in rare case scenario addEffect can be triggered before the reference is ready):
useEffect(() =>
{
const unsubscribeEffect = addEffect(() =>
{
// ...
if(time.current)
time.current.textContent = elapsedTime
})
// ...
}, [])Random level
You can see that, when we restart, we get the exact same level, which is a bit boring.
To fix that, we are going to force the useMemo in the Level component to be called again by adding a variable to the dependencies that we will change only when we restart.
First, in the useGame store, add a blocksSeed property and set it to 0:
export default create(subscribeWithSelector((set) =>
{
return {
blocksCount: 3,
blocksSeed: 0,
// ...
}
}))The word seed isn’t entirely appropriate if you are familiar with procedural generation, but let’s not be too picky.
In Level.jsx, add a seed props:
export function Level({
count = 5,
types = [ BlockSpinner, BlockAxe, BlockLimbo ],
seed = 0
})
{
const blocks = useMemo(() =>
{
// ...
}, [ count, types, seed ])
// ...
}And send that seed to the useMemo dependencies:
const blocks = useMemo(() =>
{
// ...
}, [ count, types, seed ])In Experience.jsx, retrieve seedsBlocks from the useGame store:
export default function Experience()
{
const blocksCount = useGame(state => state.blocksCount)
const blocksSeed = useGame(state => state.blocksSeed)
// ...
}Send it to <Level> with the seed attribute:
<Level count={ blocksCount } seed={ blocksSeed } />All we need to do now is to change blocksSeed to any other value when the user restarts and we can do that directly in the restart method of the useGame store:
restart: () =>
{
set((state) =>
{
if(state.phase === 'playing' || state.phase === 'ended')
return { phase: 'ready', blocksSeed: Math.random() }
return {}
})
},Every time you restart, you’ll get a new set of blocks.
Let’s put back the blocksCount to 10 in useGame to enjoy our finished game:
export default create(subscribeWithSelector((set) =>
{
return {
blocksCount: 10,
blocksSeed: 0,
// ...
}
}))
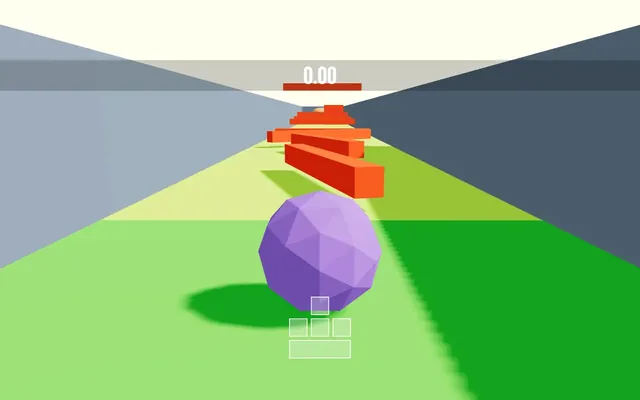
Make it pop 03:54:52
Congratulations, you’ve finished the game!
But let’s have just a little more fun and make our game pop.
Background
Although it’s only a small detail, let’s change the background.
In Experience.jsx, add a <color> and set its attach attribute to background:
export default function Experience()
{
// ...
return <>
<color args={ [ '#bdedfc' ] } attach="background" />
{/* ... */}
</>
}
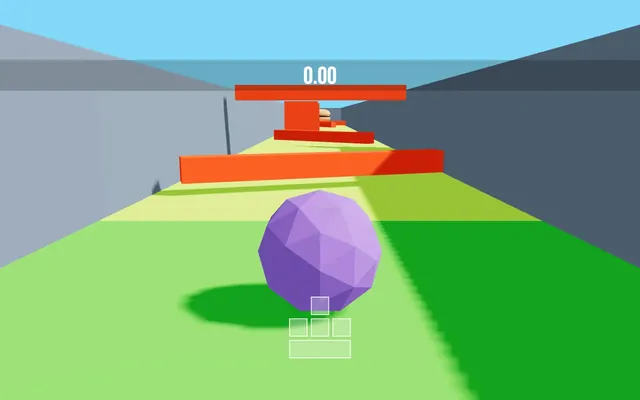
Game title
To make the initial screen more interesting, we are going to add the name of the game in a floating text box.
In Level.jsx, import Float and Text from @react-three/drei:
import { Float, Text, useGLTF } from '@react-three/drei'In BlockStart, add the <Text> with a scale of 4 and wrap it in a <Float> (we are going to call our game “Marble Race”):
export function BlockStart({ position = [ 0, 0, 0 ] })
{
return <group position={ position }>
<Float>
<Text scale={ 0.5 }>Marble Race</Text>
</Float>
{/* ... */}
</group>
}
The Bebas Neue from Google Fonts font is available in the /public/ folder as a woff file.
Set the font attribute on the <Text>:
<Text
font="./bebas-neue-v9-latin-regular.woff"
scale={ 0.5 }
>
Marble Race
</Text>
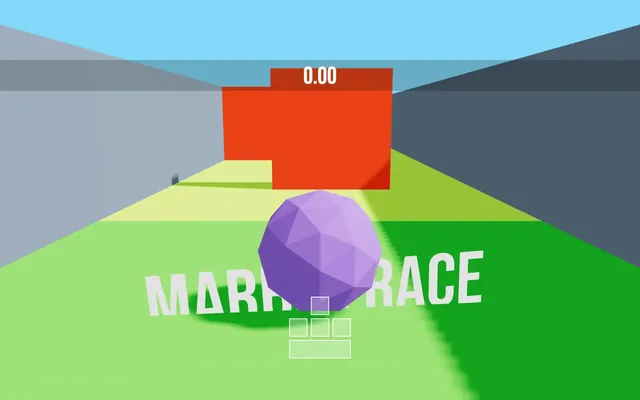
Set a bunch of other attributes to move it to the top right of the marble in order to make it look good:
<Text
font="./bebas-neue-v9-latin-regular.woff"
scale={ 0.5 }
maxWidth={ 0.25 }
lineHeight={ 0.75 }
textAlign="right"
position={ [ 0.75, 0.65, 0 ] }
rotation-y={ - 0.25 }
>
Marble Race
</Text>
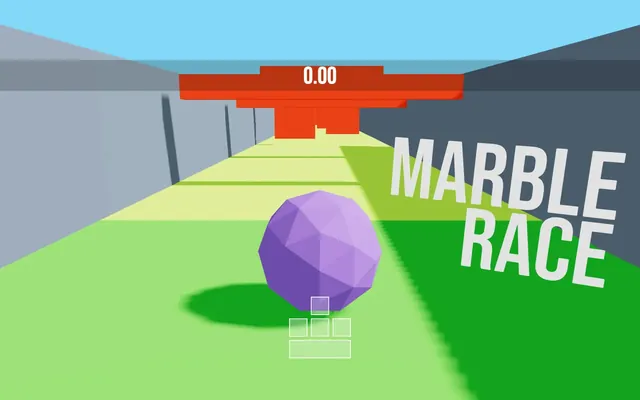
Although the text looks good, it’s too dark because it’s using a MeshStandardMaterial and the lighting isn’t optimal.
To fix that, we are going to use a MeshBasicMaterial instead.
Add a <meshBasicMaterial> to the <Text> and set its toneMapped attribute to false so that we get a pure white:
<Text
// ...
>
Marble Race
<meshBasicMaterial toneMapped={ false } />
</Text>
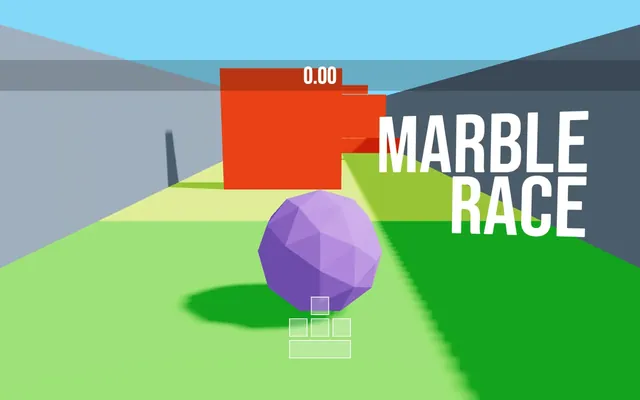
Finally, reduce the <Float> intensity a little:
<Float floatIntensity={ 0.25 } rotationIntensity={ 0.25 }>
{/* ... */}
</Float>Finish line title
Let’s add a “FINISH” title at the end of the level.
In BlockEnd, add a <Title> with the same font, a scale of 8 and the same <meshBasicMaterial>:
export function BlockEnd({ position = [ 0, 0, 0 ] })
{
// ...
return <group position={ position }>
<Text
font="./bebas-neue-v9-latin-regular.woff"
scale={ 8 }
>
FINISH
<meshBasicMaterial toneMapped={ false } />
</Text>
{/* ... */}
</group>
}Position it above the hamburger and pull it forward a little so that it’s aligned with the block limit:
<Text
font="./bebas-neue-v9-latin-regular.woff"
scale={ 8 }
position={ [ 0, 2.25, 2 ] }
>
FINISH
<meshBasicMaterial toneMapped={ false } />
</Text>Going further 03:52:54
And we are done creating our game.
Let’s see if you can finish the race in less than 5 seconds. If so, post a screen on Twitter and mention me (@bruno_simon).
What we actually did, was relatively minimal, but with just a few extras to have some fun. Feel free to improve the game and add a bunch of cool features.
Here are some ideas:
- Make the axe obstacle look like an actual balancing axe
- More traps variations
- Control over the trap size (currently it’s
4and we had to write it in many places, but this information could come from the store) - Better scenery (it feels a little empty)
- A boost key
- Boost bonuses that are spread across the level
- Different difficulties
- Sounds
- Particles
- Marble customisation
- Lasers that kill you instantly